Using stickers during chats adds an extra layer of fun to your conversations on the Telegram messaging app.
What makes it even more exciting is that Telegram, similar to WhatsApp, allows users to not only use existing stickers but also create their personalized ones.
Creating your stickers on Telegram is a straightforward process, and the best part is that you don’t need a developer account to do so.
All you have to do is send your desired images to a bot, and you’re well on your way. While the process may not be fully complete with just sending the images, you’re certainly halfway there.
If you’ve been curious about crafting your unique stickers to enhance your Telegram conversations, this article will guide you through the process.
Let’s dive in and get started on adding a personalized touch to your Telegram chats!
Design Your Sticker
Designing your stickers doesn’t require advanced graphic design expertise. Many stickers are created using amusing memes and quotes derived from existing images.
Possessing fundamental graphic design skills is generally sufficient for this task.
Sticker Requirements
You will have to follow some requirements when making the stickers, but they are all relatively easy to follow. Check them out below.
Stickers should be made of PNG images with transparent backgrounds and should be 512 x 512
The sticker pack icon is optional and should be a PNG image of 100 x 100 with a transparent layer.
You should beware of using copyrighted images since your stickers will be taken off should a copyright owner make any complaints about it.
Most average telegram sticker packs are anywhere from 10 to 20 stickers.
You can use any photo editor to make your stickers or even use PhotoGrid to make them.
Find The Telegrams Bot That Will Assist You In Creating Your Stickers
You will need to find a Telegram bot once you make your stickers and are ready to upload them.
You can find a sticker bot by opening the telegram app end and searching for ‘stickers.’
After tapping on it, a list of commands will be shown to you that you can use. Check them out below.
/newpack– for creating a sticker pack
/addsticker– for adding a sticker to a pack that already exists
/delsticker– for deleting a sticker
/ordersticker– to reorder stickers that are in a pack
/stats– to see usage stats of your stickers
/top– for top stickers
/packstats– for usage stat of a sticker pack
/packtop– to see the top sticker packs
/cancel– to cancel any previous commands used
What you need is /newpack or /addsticker.
Upload Your Sticker
The sticker bot will make it easier for you to upload your stickers and publish them. Do the following.
Type /newpack and then press enter
You will be asked for the name of your sticker pack. Type it in
Click on the file icon to upload the first sticker. Please do not use the camera icon, as the bot will reject it.
You will be asked to assign an emoji to the sticker. Choose one
When done, type in /publish and press enter for the stickers to be published.
You can add an icon to the sticker pack by uploading it using the steps above. Type in /skip if you do not have an icon to add
Now send a short name of your sticker pack to the bot. This will be used in the URL of the sticker pack.
After all, is done, you can click on the link to your sticker pack to see how it all turned out.
Sending Stickers
You can send the stickers you made yourself since Telegram does not have a sticker store.
You can share it by clicking on the URL of the sticker pack and then sharing it.
Doing this will send a link to the pack to a contact you choose or add it to your collection to enable you to send the stickers one by one.
Conclusion
So that is how to create a telegram sticker pack, upload it, and share it with your friends and family.
I hope you can now design and make your stickers to share with your loved ones on Telegram, you can check out the best Telegram channels to join if you want to have some fun on the app.
Using WhatsApp without your phone number can be useful for various reasons, whether it’s for privacy concerns, boasting with a foreign number, or using an international number to receive global messages.
This article will guide you through several options for using WhatsApp without relying on your phone number.
WhatsApp, being the most popular messaging app globally, has millions of users, and the demand for alternative sign-up methods has led to the exploration of such options.
It’s worth noting that this guide assumes you have already installed WhatsApp but haven’t verified it yet. If it’s already verified, you’ll need to delete the app and reinstall it or clear its data before proceeding.
Stay tuned as we delve into the steps and methods that allow you to use WhatsApp without providing your mobile phone number, providing you with the flexibility and privacy you may be seeking.
Let’s explore the options available to open a WhatsApp account without the need for a phone number.
TextNow
If you have read the Telegram article, you would be familiar with using this method. For those who have not, here we go.
First, download the TextNow app onto your mobile device and install it. You can get it from either Google Play, Windows, or the Apple app store.
After installing it, open the app and get your desired number by choosing the country between the USA and Canada. If you forget to note down the number you chose, you can get it back by tapping on the three-dotted line, which can be located at the top left corner of the screen. It would help if you went to the People tab on windows phone, and your number will be shown there.
Now go to your WhatsApp and verify the number you got from the TextNow app by inputting it when WhatsApp asks for your number. After that, you will wait for the verification code from WhatsApp.
When the code comes, it will be in the TextNow app. So you will go there and get the verification code and input it in WhatsApp. If the code is not there, wait a bit for WhatsApp to call you with the code.
After that, finish the process by uploading a profile photo and your name, and you are done.
Using A Landline Telephone
If you do not want to use the TextNow app and have a landline telephone around, you can use it to sign up for WhatsApp without your phone number. Please follow the steps below to use this method.
Open your WhatsApp and then enter your landline number during the signup process.
A verification code will need to be sent to the landline, but since the landline cannot receive text messages, you will have to wait for about two minutes for WhatsApp to call you with the verification code.
After getting the verification code through the call, please enter it in your WhatsApp to complete the process.
Once you are done with that, you upload your profile photo and enter your name, and you are done.
Conclusion
While it’s important to note that WhatsApp typically relies on your phone number for account verification and spam prevention, your article provides valuable insights into using WhatsApp with alternative numbers.
This guide is particularly useful for those seeking privacy or wishing to use different numbers for specific purposes.
Your efforts to share this information contribute to the knowledge base of users who may have specific needs or concerns related to their WhatsApp usage.
The steps outlined in the article offer a practical solution for those looking to use WhatsApp with a number other than their own.
If you found this article helpful, don’t hesitate to express your appreciation by liking and following the site for more valuable content.
Keep up the good work in providing informative articles that cater to the diverse needs of your audience.
If there are any specific topics or questions you’d like assistance with in the future, feel free to let me know.
Telegram has become one of the most popular messaging apps due to the shortcomings of its arch-rival, WhatsApp.
Telegram is more privacy-focused than most of the messaging apps in existence and this has made people flock over to it.
One of the features that set it apart from other messaging apps is the ability to allow users to hide their identities.
Another feature is that users can make use of the app without their phone numbers. Yes. You can use telegram without your phone number and you are going to see how you can do that in this article.
This article will be showing you just how you can sign up for a telegram account without having to put in your phone number. Let us see how to do that.
How To Use Telegram Without Phone Number
Just like WhatsApp and most other messaging apps, you need your phone number before you can sign up for an account to start chatting with your friends and loved ones.
This helps the messaging apps to curb spamming messages as well accounts that would be created for fraudulent activities.
However, this may also be a problem for real users who do not like to use their phone numbers to open an account.
Also, there could be people who may want to use telegram but are using an iPhone with e-sim, which means that they do not have sim cards in the phone.
In this case, they would need to be able to sign up without a phone number.
Because of this limitation, there must exist a method to sign up for Telegram without providing a phone number.
Below, you can discover how to accomplish this. Additionally, Telegram offers the option to obscure the phone numbers associated with your account, providing an added layer of privacy and security.
TextNow App
This method offers perhaps the simplest way to sign up for Telegram without using your phone number.
The app provides you with a complimentary phone number, typically originating from either the US or Canada, which you can use to verify your Telegram account.
You can download TextNow from the Google Play Store or the Apple App Store. You can also get it on the Windows store if you are Telegram on PC and the App Store for your Mac.
After you have downloaded the app and installed it, you open it and follow the instructions that will be shown to you. When you set the app up, you will be prompted to choose the free phone number that you would like to use.
Ensure that you make a note of the selected number as you will utilize it for signing in to your Telegram account. This number serves as your unique identifier for accessing the platform.
However, in case you forgot to write the number, just open the TextNow app and click on the three-line icon. Go over to the ‘people’ tab. You will see the number. You can now go ahead and verify your TextNow account.
How To Use The Number To Sign Up For Telegram
Now download the Telegram and install it on your phone.
After that, open the app tap on ‘Start messaging’
Now, on the next screen, choose your country. Select the country as the same one you selected on the TextNow app. Enter the TextNow number you chose and then click ‘next’
A verification code will then be sent to your TextNow number.
Go to the TextNow app and you will see the verification code there. if it is not there, then there will be a call from telegram to the number. Answer the call in the TextNow app and you will get the verification code.
Now, go to telegram and enter the verification code that you received.
After the number gets verified by telegram, you finish the setup by adding a picture for your profile along with a name.
Using Landline Number
You can also use a landline number to signup for your telegram. Please follow the steps below.
You will have to open the telegram app after installing it choose your country and then enter your landline number
Landlines cannot receive text messages so you will have to wait a bit for a telegram to call and then you can get the verification
Now go to the telegram app and input the verification code you heard on the call
Conclusion
Now, with these two methods at your disposal, you can sign up for Telegram without using your phone number.
While Telegram typically requires a phone number for registration, these alternative methods enable you to utilize a different number, safeguarding your personal information from the app.
I hope the article has provided the information you were looking for. Make sure you visit this site more often for tech info and news.
Users can broadcast messages to a large audience on Telegram using a function called “Channels,” but other users cannot respond to these messages.
Channels serve as a broadcasting tool for announcements and notices, typically with one-way communication.
In a channel, only administrators have the privilege to send messages, while members read the announcements without the ability to reply.
For Telegram users interested in starting their channel to broadcast announcements to a specific audience, the following steps will guide you through the process. Please continue reading to learn how to create and manage a channel on Telegram.
How To Create A Telegram Channel
The steps below will show you how you can create your Telegram channel for whatever it is that you want to use it for. Please follow the steps below carefully.
Open the Telegram app and then tap on the pencil icon. This can be located at the bottom right corner of the screen
Now, click on the ‘new channel’ option. After you choose this option, you will be shown a brief description of what the Telegram channels are and their use. After that, you will now be set to give a name to your channel along with a description of what the channel is and even some emojis if you want to.
You also have to decide whether the channel you are creating will be a public channel or a private channel. If you choose to make the channel a private one, you will be given a private link by Telegram which can be sent to your friends to join the channel. However, if you decide to make it public, then people will be able to join it easily by just searching for the name on the app.
After the channel has been created, you will now have to invite people to join it. all your contacts will be shown to you and then you just tap on the ones that you want to add to the channel
In case you forgot to add a particular contact at the beginning, you can add them later by going to the channel name at the top of the screen and tapping on subscribers, and then tapping on ‘add subscribers’. Choose the people you want to add to the channel.
You can also add administrators in the Telegram channel settings and even Tap the three dots at the top of the screen to initiate a voice conversation.. You can also add a shortcut of the Telegram to your smartphone home screen.
You can also change the channel name along with its profile photo and even create an invite link by tapping on the pencil icon
Conclusion
Creating a Telegram channel is a straightforward process, and your main consideration will be choosing a fitting name for the channel.
Telegram allows you to easily set up your channel, providing you with a platform to broadcast announcements to your intended audience.
I trust that this article has proven helpful to all Telegram users. Feel free to share your thoughts and opinions on this article by liking and commenting in the section below.
If you have further questions or topics you’d like to explore, please let me know, and I’ll be happy to assist you.
Looking for how to tell when X (formerly Twitter) account was created? then this article is definitely for you.
We all know Twitter to be one of the best and strictest social media apps.
On Twitter, it is pretty challenging to create fake accounts as Twitter is known for always kicking out fake accounts, especially when your account gets reported several times.
Since many people get their accounts disabled or suspended when Twitter detects unusual activity, it is pretty hard to maintain a Twitter account for a very long time.
I recently published an article taking you through how to have an invisible name on Twitter and after it got published, I received a lot of messages from people asking me if it is possible to know when a Twitter account was created.
The answer is yes, there is a way to know when the Twitter account was created and this article is going to cover everything you need to know.
There may be so many reasons why someone might want to know when someone created a Twitter account.
Since the platform has many rules and regulations guarding it against making sure tweets are clean, many people who violate them lose their accounts, and when you can use your account for a longer time, it becomes an achievement.
Before getting to know when you created your Twitter account, let us first cover when Twitter was created
So When Was Twitter Created?
Twitter was created on March 21, 2006, in San Francisco, the United States by Jack Dorsey, Noah Glass, Biz Stones, and Evan Williams.
Some people will also want to know when their friends joined Twitter to debate who joined Twitter first.
Knowing when you first joined Twitter also helps you know how many years you have been in that app and the actual month you joined Twitter.
Although Twitter shows the year a user joined and started using the app, it does not show the actual date that the user entered.
That is why in this article, I will take you through how to know the day, month, and year you joined Twitter.
How To Tell When A Twitter Account Was Created Using A Website
Now type in your Twitter username without the @ sign and click on Search
Now you will find the day, month, and year that you joined Twitter. Aside from that, you will also see the first ten tweets you made when you first joined Twitter.
Conclusion
Now it is easy to know when a Twitter account was created or when someone joined Twitter.
In this article, we went through everything you need to know when it comes to finding out when someone first joined Twitter and the first tweet they made.
Frequently Asked Questions When It Comes To Knowing When A Twitter Account Was Created
WhatsApp stands as the most popular messaging app globally, dominating the tech industry with no clear competitor in sight.
Despite its widespread use, some users have expressed dissatisfaction with WhatsApp’s limited customization options.
In response to this demand, third-party app developers have stepped in, with GBWhatsApp emerging as one of the most popular alternatives.
Various WhatsApp clone apps offer users enhanced customization features beyond what WhatsApp itself provides.
These third-party apps often come equipped with additional functionalities, providing users with a more tailored messaging experience.
It’s crucial to note, however, that while these alternative apps offer increased customization, they may pose security risks.
Unlike WhatsApp, which places a strong emphasis on security and end-to-end encryption, third-party apps might compromise user data and increase vulnerability to hacking.
In today’s article, we’ll delve into some of these alternative apps, exploring their features and potential risks.
Users need to weigh the benefits of customization against the security concerns associated with using third-party applications, ultimately making informed choices for their messaging needs.
YOWhatsApp
YOWhatsApp, one of the WhatsApp clone apps, comes with a unique feature that sets it apart.
Unlike the original WhatsApp, YOWhatsApp allows you to lock the application without the need for a separate app for this purpose.
This added security feature provides users with an extra layer of privacy.
Additionally, YOWhatsApp offers a customization feature that allows users to hide their ‘last seen’ status selectively.
In the original WhatsApp app, users have the option to hide their ‘last seen’ from either all contacts or non-contacts.
However, YOWhatsApp takes this a step further by enabling users to customize their ‘last seen’ visibility, allowing them to show it to some contacts while hiding it from others.
While these features provide enhanced customization options, users should be aware of the potential security risks associated with using third-party WhatsApp clone apps.
These apps may not adhere to the same security standards as the original WhatsApp, potentially compromising user data and privacy.
Users should exercise caution and prioritize security when considering alternative WhatsApp applications.
FMWhatsApp
The app you’re referring to, which allows users to use multiple numbers simultaneously, seems to provide a unique feature.
While its customization options may be fewer compared to other apps on the list, it compensates by enabling users to manage several numbers seamlessly.
Moreover, the app boasts an impressive feature allowing users to send files of up to 1GB in size to their contacts.
This capability goes beyond the file size limit typically imposed by many messaging apps.
Additionally, the app offers a variety of ticks and bubble styles, providing users with over 30 options to choose from.
This feature enhances the visual customization of the messaging experience, allowing users to personalize their conversations according to their preferences.
As with any third-party app, especially those outside the official app store, users should exercise caution and consider the potential security risks associated with using such applications.
It’s crucial to prioritize the security of personal data and communications when exploring alternative messaging apps with unique features.
OGWhatsApp
It seems that the OGWhatsApp app brings a set of distinct features to the table. Users of this app can enjoy a diverse array of themes, allowing them to personalize their messaging interface according to their preferences. This abundance of themes enhances the visual customization options available to users.
In addition to theme variety, the app extends the character limit for status updates, allowing users to express themselves with longer text updates than what is typically permitted on the original WhatsApp.
Furthermore, OGWhatsApp enables users to send videos and audio files in larger sizes, potentially accommodating higher-quality media content. This feature can enhance the multimedia-sharing capabilities of the app.
An interesting and unique feature is the ability to zoom in on the profile pictures of your contacts. This adds a level of detail and exploration to the app’s user interface.
However, users should exercise caution when using third-party apps like OGWhatsApp, as they may not offer the same level of security and privacy features as the original WhatsApp.
It’s crucial to balance the allure of additional features with the potential risks associated with using alternative messaging apps.
GBWhatsApp MiNi
GBWhatsApp MiNi appears to be a lightweight WhatsApp clone designed to operate efficiently on smaller Android phones with limited RAM and CPU power.
This makes it a practical choice for users with less powerful devices who still want to enjoy the features of a WhatsApp clone.
One notable aspect is that GBWhatsApp MiNi uses the pure official skin of the original WhatsApp, providing a familiar interface for users.
However, it introduces the flexibility for users to choose the type of skin they prefer, allowing for some level of customization.
Despite being a trimmed-down version of the popular GBWhatsApp, GBWhatsApp MiNi retains all the essential features that contributed to the popularity of its larger counterpart.
Users can expect a similar user experience, as the app aims to provide the key functionalities that made GBWhatsApp widely used.
It’s important to note that while GBWhatsApp MiNi may offer a streamlined experience for users with smaller devices, users should remain cautious about the potential security risks associated with third-party WhatsApp clones.
Security and privacy should be prioritized when considering alternative messaging apps, even those designed for smaller devices.
WhatsApp Indigo
It appears that this WhatsApp clone app stands out with its modified bubbles featuring various colors like grey, crayon, and pink. This customization allows users to personalize their messaging interface to a greater extent.
A notable feature of this app is the ability to send files as large as 72MB to contacts. Additionally, users can send photos in their original quality, a capability not present in the original WhatsApp.
The ability to maintain the original quality of photos and send larger files is a significant draw for users seeking enhanced media-sharing options.
This reflects a trend where users are drawn to third-party WhatsApp clone apps for features that go beyond the offerings of the original WhatsApp.
The appeal often lies in the additional functionalities and customization options provided by these alternative apps.
While these features can make the usage of third-party WhatsApp clones helpful and enjoyable, users should remain vigilant about potential security risks.
Security and privacy should be prioritized, and users must weigh the benefits of additional features against the potential vulnerabilities associated with using alternative messaging apps.
Conclusion
You’ve rightly pointed out that the WhatsApp clone apps mentioned above offer additional features not found in the original WhatsApp.
These added functionalities, such as customized themes, larger file-sharing capacities, and enhanced media quality, contribute to the appeal of these alternative apps.
However, it’s crucial to emphasize that despite the extra features, the safety and security of these clone apps may not match the standards set by the original WhatsApp.
The risk of potential vulnerabilities and exposure to hacking is higher with third-party apps.
While these additional features can enhance user experience, users must carefully consider the trade-off between customization and security.
If users choose to explore alternative WhatsApp clones, they should do so with a clear understanding of the associated risks. Being aware of potential security issues and taking necessary precautions is essential.
Ultimately, users should prioritize the safety of their data and communications, and if security is a top concern, sticking to the original WhatsApp, which emphasizes end-to-end encryption and security features, may be the safest choice.
In its early days, the basic design of WhatsApp was tailored for use on mobile phones only. The popular messaging app operated solely on mobile phone numbers and wasn’t initially compatible with computers.
However, it later became available for computer use through ‘WhatsApp Web,’ where the computer version was essentially an extension of the phone and required the mobile phone to be nearby.
In recent developments, the app can now be used on a computer independently, without the need for a mobile phone.
There are several methods to achieve this, and in this article, we will explore the various ways you can use the WhatsApp messaging app on your computer without relying on a mobile phone.
Let’s get rolling
Using Android Emulators
One method to use WhatsApp on your computer without a mobile phone is by utilizing Android emulators.
Emulators like Bluestacks create an environment on your computer that mimics an Android interface, allowing you to run Android apps on your computer.
In this article, we will focus on Bluestacks as an example of an Android emulator.
Download Bluestacks from their official website, bluestacks.com.
Install the downloaded application by double-clicking on the installer.
After installation, open Bluestacks by clicking on the app icon.
You’ll find WhatsApp listed in the app, but if not, use the search bar to locate it.
Install WhatsApp by clicking on the “Install” button.
If you enter a landline number, choose the “Call Me” option, and WhatsApp will call you with the verification code.
Enter the received code on your computer, and your WhatsApp account will be created.
Bluestacks provides a simple and convenient way to use WhatsApp on your computer without the need for a mobile phone. Remember, you’ll still need a mobile number for registration.
Third-party Software
Some third-party software options claim to run the WhatsApp messenger app on a computer. However, we do not recommend any specific apps, as we have not tested them.
WhatsApp Web
WhatsApp Web is the official method to use WhatsApp on your computer, but it requires an active WhatsApp account on your mobile phone.
Open the WhatsApp app on your mobile phone.
Tap on the three dots in the top right corner and select “WhatsApp Web.”
Visit web.whatsapp.com on your computer’s web browser.
Scan the QR code displayed on the website using your mobile phone.
Once scanned, your WhatsApp account will be duplicated on the computer, and you can start chatting.
Please note that WhatsApp Web is not an independent application but rather mirrors your WhatsApp account onto the computer for chatting convenience.
Conclusion
WhatsApp is widely recognized as one of the most popular social messaging apps, offering a convenient means of communication.
Initially designed for use on mobile phones, WhatsApp has evolved to be accessible on computers as well.
This article has detailed how to use WhatsApp on a computer independently, without relying on a mobile phone.
Various software options, including Android emulators like Bluestacks and third-party applications, were discussed as methods to achieve this.
Additionally, the official WhatsApp Web was highlighted as an alternative for computer use, requiring an active WhatsApp account on the mobile phone.
By exploring these methods, users can choose the most suitable option for running WhatsApp on their computers, providing flexibility and convenience in their messaging experience.
Dating is a common and diverse experience, with people meeting through various means such as physical encounters, social media, and even televised shows like ‘Date Rush.’
However, one less-discussed medium for connecting with potential partners is through dating apps.
Dating apps serve as platforms where individuals specifically seek others for dating purposes, providing a straightforward approach to finding potential matches.
Recent research indicates an increase in the search for dating apps, suggesting a growing interest in online dating.
If you’ve been unsuccessful in meeting someone through traditional means and are open to exploring alternative avenues, dating apps offer a convenient solution.
While dating websites exist, not everyone has the time to log onto a website, leading to the rise of mobile dating apps.
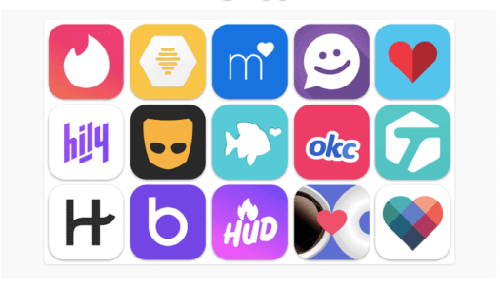
To assist you in this realm, we’ve compiled a list of some of the best dating apps in this article. Feel free to browse the list and choose one to try your luck.
Dating apps are designed to connect individuals, so you’re likely to find like-minded people.
Exploring the world of online dating through these apps has its benefits, and it can be an exciting way to broaden your horizons and increase your chances of meeting someone compatible.
Below are the dating apps you can use to find that soul mate you are looking for in Ghana.
Sweetmeet
Sweetmeet stands out as a versatile dating app, making it accessible to both Android and IOS users.
With a user-friendly interface, the app provides a seamless experience for individuals seeking connections.
Its availability on multiple platforms ensures a broad reach, allowing users to engage with potential matches effortlessly.
Meet4U: Meet4U is a platform that goes beyond mere matching; it fosters conversations. Compatible with both Android and IOS, the app serves as a hub for users looking to chat and establish meaningful connections.
Its emphasis on communication sets it apart, creating an environment where users can interact and discover new connections.
Meet2U
Meet2U, available on both Android and IOS, focuses on simplifying the meeting process. It’s designed to facilitate easy communication and interaction between users.
The app’s user-friendly features make it an ideal choice for those looking to meet and connect with new people seamlessly.
DateLove
For individuals seeking serious relationships, DateLove comes into play. This app caters to those with a commitment to long-term connections.
It distinguishes itself by fostering an environment where users prioritize meaningful relationships, making it a go-to for those looking to find love and companionship.
FastMeet
True to its name, FastMeet offers a quick and efficient way to meet new people. With compatibility on both Android and IOS devices, the app is designed for users seeking swift connections.
It stands out for its focus on providing a platform where users can engage in rapid yet meaningful interactions.
Hitwe
Hitwe is more than just a dating app; it’s a social discovery platform. It enables users to explore and connect with individuals globally.
The app’s inclusive approach to social interaction distinguishes it, making it a space where users can broaden their connections on a global scale.
Zoosk
Zoosk is a well-established player in the online dating scene, known for its extensive user base. Accessible on both Android and IOS, Zoosk utilizes behavioral matchmaking technology to enhance the matching process.
It distinguishes itself by providing a platform where users can find matches based on their behaviors and preferences.
US Divorce Single Parents Meet
Catering specifically to single parents who have undergone divorce, this app offers a supportive environment.
It stands out for its focus on individuals with shared experiences, creating a space where single parents can connect and build relationships with understanding and empathy.
Sweet Date
Sweet Date creates an atmosphere of positivity and enjoyment in the dating scene. Accessible on both Android and IOS, the app aims to bring people together sweetly and memorably.
Its unique approach sets it apart, offering users a delightful experience in their quest for connections.
Mpenatwe
Tailored to the preferences of Ghanaians, Mpenatwe is designed to resonate with the local dating scene.
The app provides features that cater specifically to the needs and interests of Ghanaians, offering a platform where individuals can connect within the context of their cultural background.
OkCupid Dating
OkCupid is a well-recognized app that boasts a diverse user base. With compatibility on both Android and IOS, the app stands out for its use of algorithms and personal preferences in matchmaking.
It aims to provide users with matches that align with their unique characteristics and preferences.
Mingle2 Online Dating and Chat
Mingle2 is crafted for those seeking online dating and friendly conversations. With compatibility on both Android and IOS, the app emphasizes easy and casual interactions.
It sets itself apart by providing a platform where users can engage in conversations and build connections in a relaxed environment.
Find Real Love
For those in pursuit of genuine and lasting connections, Find Real Love comes into play. Accessible on both Android and IOS, the app focuses on fostering authentic relationships.
It distinguishes itself by creating a space where users can embark on a journey to find real and meaningful love.
Jelly
Jelly takes a unique approach to online dating by encouraging users to explore diverse interests and hobbies.
Available on both Android and IOS, the app stands out for its emphasis on creating connections based on shared passions. It provides a platform for individuals to connect in a more nuanced way.
Sugar Mommas Dating
Tailored for those interested in dating older women, Sugar Mommas Dating caters to a specific niche. The app offers a platform for connecting with sugar mommas and is available on both Android and IOS.
It distinguishes itself by providing a space for individuals with particular preferences in the dating realm.
Adult Dating Gaseste
Geared toward adults seeking casual relationships, Adult Dating Gaseste provides a discreet platform. Accessible on both Android and IOS, the app stands out for catering to those looking for casual and adult-oriented connections.
It offers a space where individuals can explore their preferences with like-minded adults.
Moco
Moco goes beyond the typical dating app by offering a social networking platform with a dating focus. Available on both Android and IOS, Moco allows users to meet new people and engage in conversations.
It distinguishes itself as a space where users can broaden their social circles while exploring potential romantic connections.
Conclusion
These dating apps are available for free download on both Android and iOS platforms. Simply download one of these apps, and you might just connect with that special someone you’ve been searching for. Best of luck in your quest for love.
Certainly, receiving anonymous calls can be a frustrating experience, leaving you without the means to identify the caller or return the call.
I understand the inconvenience this can cause, as it’s a situation many of us have encountered.
In addressing this concern, we present an effective solution: the Truecaller app. This app serves as a valuable tool to unveil the identities of individuals making anonymous calls, providing a sense of control and peace of mind.
Having personally faced this challenge, I empathize with the frustration it brings. Truecaller, however, offers a practical way to mitigate such issues by revealing the identity of those attempting to disrupt your peace.
Stay tuned as we guide you through the process of using the Truecaller app to regain control over your incoming calls and ensure a more secure and informed communication experience.
What Is Truecaller App?
Truecaller is a versatile mobile application that enhances the user’s phone experience. Among its notable features are caller identification, call blocking, flash messaging, and call recording.
To access the services Truecaller provides, users must register by verifying their cellular numbers. This ensures a secure and personalized experience within the app.
Created by True Software Scandinavian AB, the app debuted on July 1st, 2009. Since then, it has gained widespread popularity, boasting more than 250 million users globally.
Notably, a significant portion of this user base hails from India, where Truecaller has garnered substantial adoption.
Available for download on Android, Windows, Blackberry, and iOS devices, the app can be easily obtained from the respective app stores.
Its straightforward user interface makes it accessible to a broad audience, ensuring that almost anyone can navigate and benefit from its features.
Whether you seek caller identification, call blocking, or other functionalities, Truecaller simplifies the management of your phone communications.
How To Identify A Number Using Truecaller
Utilizing Truecaller to identify a caller is a straightforward process with several effective methods. Here’s a step-by-step guide to make the most of this application:
Download and Install the App:
Begin by downloading the Truecaller app from your respective operating system’s app store.
Create an Account:
After installation, register for the app by creating an account. This step is essential to access the full range of features offered by Truecaller.
Consider the Premium Package:
While the app provides free features, exploring additional functionalities may require opting for the premium package, available through a subscription.
Identify Callers:
Copy the number from the recent call that you want to identify.
Paste the number into the Truecaller app’s dialer.
Call the number again through the app.
Witness the caller’s name displayed above the number in full.
Truecaller Live ID (For Android and Windows Users):
If you are an Android or Windows user, consider using the Truecaller Live ID method.
Ensure a stable internet connection before proceeding.
Type the number you want to identify using Truecaller Live ID, and the associated name will appear instantly.
By following these steps, you can harness the power of Truecaller to quickly and accurately identify callers, providing you with valuable information and enhancing your control over incoming calls.
How To Delete Your Number From Truecaller
Maybe you are done identifying all the numbers harassing you, and you feel like you no longer need the Truecaller app.
You can remove your number from the app and delete the account. Follow the steps below to get that done.
Open the app
Click on the three-dotted icon, which can be found in the top right corner
Click on settings
Go to Privacy
Click on deactivate
Click on Yes to confirm
Conclusion
The Truecaller app stands out as a fantastic tool to combat spam calls and unveil the identity of those attempting to contact you.
In some instances, the app is designed to promptly display the caller’s identity when a call is received. The immediacy of this display may vary based on factors such as the version of the app and the type of smartphone being used.
For individuals keen on knowing the identity of every caller and gaining better control over their incoming calls, installing the Truecaller app on your smartphone is highly recommended.
This app has proven to be effective in providing users with valuable information, ultimately contributing to a more secure and informed communication experience.
Take advantage of the Truecaller app to ward off spam and enhance your overall telecommunication interactions.
We hope the article was beneficial. Don’t forget to keep visiting this site for more tech-savvy gigs like the best free music apps and many more on our website.
Whatsapp is by far the most popular messaging app on the planet currently, and this article is going to show you how to save WhatsApp status.
Gone were the days when people found it difficult to message each other, but WhatsApp came and solved that problem.
The app came as a messaging app, and then many features were added to it, such as voice notes, read receipts, Status, and many more.
You might be using all these features, but the one that we will talk about is the WhatsApp status feature.
On February 24, 2017, WhatsApp launched the new status feature; this new feature allows its users to post texts, pictures, and videos on a newly created tab named ‘Status’.
The post will be available for 24 hours, and then it will vanish from there, just like Snapchat and Facebook stories.
Ever since this new feature was launched, it has made the messaging app one of the most exciting places to be.
With the status feature, you can get to know how your friends are doing and what they are going through, and you can also let them know what’s happening in your life.
But what if you see an interesting video from one of your friends and want to have that video and watch it later or also post that same video?
What most people tend to do is reply to the video they have seen by telling the person to send it to them. That is where you will see the ‘Send me’ ‘Send Me’ gangs.
If you are one of them, this article is definitely for you. In this article, I will take you through the top 5 ways to save WhatsApp status yourself without having to ask anyone to send you the video, so without wasting much time, let’s dive right in.
How To Save WhatsApp Status With Your Phone Gallery App
Every phone comes with a gallery, and you can save the pictures or videos you watched of someone’s Status with the help of your gallery.
Open your phone gallery.
Click on the three horizontal dots (also known as options)
Go through the files, and you will see the. Status folder. This folder contains all the Status you have watched.
To save any file, all you have to do is copy the file (either image or video) and paste it to a different folder that is always visible.
Please note that some phones don’t come with a gallery, also some come with a gallery, but these galleries won’t allow you to view hidden files.
That is why we have gathered all the steps for you to choose from the one that works for you, and this leads us to our next step on saving WhatsApp status.
How To Save WhatsApp Status Using Phoenix Browser
Phoenix is one of the best browsers out there; it is one of my favorite browsers because of how fast it is when browsing.
Aside from browsing, it also has many features to get you hooked on the browser, and one of them is you can save WhatsApp status using that same browser.
Yes, you heard me right, it is not only just a browser, to does this,
Open your Phoenix Browser
Click on Files, which is next to the Tabs Icon.
On your files, click on Status Saver.
Here, you will see all your viewed statuses. To save any of them, all you have to do is open that file and click on save. I like this browser because it can help you save and then reshare your WhatsApp status.
How To Save WhatsApp Status Using ES File Explorer
ES File Explorer is one of the best file managers for mobile apps. You can do a lot of tasks right from the app, and saving WhatsApp status is one of them. Here is how to keep WhatsApp status with es file explorer.
Download and open your Es File Explorer
Tap on the three horizontal lines on the top left and activate ‘Show Hidden Files. This will allow the file manager to show you all the hidden files.
Now go back and select the Whatsapp folder.
Select Media and select Status. Here you can see all the Status you have watched. You can then move them to another folder if you don’t want to lose them.
Conclusion
With everything happening in the Tech world, in my opinion, WhatsApp will continue to be the most used messaging app for now.
This is because they keep adding features that make it easy to use.
In this article, we went through the easy ways to save WhatsApp status without asking anybody to send it to you. You can also check out how to hide Facebook likes here.
![How To Make Telegram Stickers [Step By Step Guide]](https://emmarnitechs.ghanadirector.com/wp-content/uploads/2022/06/how-to-create-Telegram-stickers.jpg)