If you are considering the deletion of your Telegram account due to reasons related to the messaging app, this article provides a professional guide on the process.
Whether you are using an Android or iOS device, the steps outlined here are designed for ease of execution.
It’s important to note that the Telegram app cannot be uninstalled directly from your Android or iOS smartphone; instead, the procedure requires the use of a web browser.
This is the sole method through which you can either deactivate or permanently delete your Telegram account.
However, it is crucial to be aware that the deletion of your account is irreversible, and reinstallation of the app in the future will result in an inability to recover your chats.
For those contemplating a future reinstallation to resume prior usage, it is recommended to create a local backup of your chats before proceeding with the account deletion process.
How To Delete Your Telegram Account
Below are the steps through which you can delete your Telegram account.
Enter the phone number you used in registering for an account on Telegram. The number will start with the country code, which is +233 for Ghana
Now, input the confirmation code that will be sent to your telegram account
Now, click on ‘deactivate account’
Confirm your decision by clicking on ‘yes, delete my account
Your telegram account will now be deleted permanently and you are done.
Conclusion
The process outlined above demonstrates how to delete your Telegram account, showcasing its straightforward nature.
It is important to note that utilizing the Telegram app itself for this purpose is not feasible; instead, the deactivation must be carried out through the dedicated online deactivation page.
Furthermore, for those planning to reinstall the app in the future, it is advisable to create a local backup of your chats before initiating the deactivation process.
This precaution ensures the preservation of chat history should you decide to resume usage at a later date.
The surge in Telegram’s popularity has led to a substantial increase in downloads, making it a prominent privacy-focused app.
Telegram has positioned itself as a direct competitor to Meta’s Whatsapp, a widely used messaging platform globally.
In a recent article, we delved into how to use Telegram bots, and in this piece, we will explore the best Telegram bots to enhance your messaging experience.
For those not yet familiar with Telegram bots, let’s briefly explain what they are.
What Is A Telegram Bot?
Telegram bots serve as third-party applications that any Telegram user can create using the Telegram Bot API.
These automated accounts function as chat entities and can be added as contacts, allowing users to interact with them.
Bots were introduced to the Telegram app in 2015, expanding its functionality and offering users the flexibility to create bots for various purposes.
Best Telegram Bots To Choose From
So now that you know what a Telegram bot is, let us look at some of the best ones that you can use on the Telegram app. Bots can be used for many things according to how they were programmed by the makers.
There are bots for playing music, sending emails, and many other tasks. Keep in mind that we cannot define what a good telegram bot is. Many you can do so after you have tried these out.
Trello Bot (username- @trello_bot)
This is a Kanban board for setting tasks and getting notifications from your Trello board. Before using the Trello bot, you first have to let it know the board to which you intend to link it. Once the connection has been completed, you can now add a Trello board to the group and even create some Trello cards.
Just search for @trello_bot in the search engine in the app and then start a conversation with the bot after locating it. You will have to choose the event to receive your Trello notifications
Gmail bot (username- @gmailbot)
You can use your Gmail account without having to leave Telegram while chatting. All you have to do is to search for @gmailbot. This bot can be used for receiving, sending, and replying to emails quickly as if they were instant messages.
Just locate the bot by searching for it and then pressing on the ‘start’ to begin chatting with the bot.
Spotify bot (Username @spotify_to_mp3_bot)
This bot is strictly for music lovers on Telegram. This is a music bot that allows you to play music without having to leave Telegram. You will have to link your Spotify account to the Spotify bot for this to work.
After that, you will then be able to search, download, and play your favorite music from the Spotify database. You will have to choose from a list of menus after the connection to your Spotify account has been completed.
Manybot (username- @manybot)
Creating a Telegram bot involves some bits of coding from the creator. Due to this, people were not able to create the bots they needed. However, manybot solve that problem easily by allowing you to create a bot without any coding knowledge.
To create a new bot with manybot, start the command and then go to BotFather which is used for creating new bots, and follow the prompts on creating the bot.
You will choose a new bot name and an API token which will be linked to Manybot. After that, give a short description of the bot, and you are done.
OpenMember
Openmember is one of the best bots that you can use on Telegram. This bot allows you to accept membership payments for your Telegram channels and groups.
It has a dashboard that allows you to charge people before they can get access to your group, channel, or even your course.
All you have to do to get started is to visit openmember. co and sign up, after that follow the process to set up and start receiving payments.
GameBot
There was a time when you could play games on WhatsApp but not anymore. But on Telegram, it is now easy to play games with your friends.
GameBot helps you do that, all you have to do is search for @gamebot and then click on start, and the bot will ask you to choose the friend that you want to play the game with.
After choosing your friend, you will then be asked to choose the game that you want to play with your friend.
Conclusion
So these are some of the best Telegram bots you can use on the Telegram app. There are a lot of bots you can use on Telegram depending on what you want. Remember to search for the bots with their usernames and not their display names.
Searching with a username allows the specific bot you are looking for to come out quicker.
You now know how to look for bots and make use of them. Hope this article has been helpful for cherished tech lovers.
We all once a time want to stand out, even on social media. That is why in this article, we will cover how to write in different fonts on Twitter. This article is also the same as changing your username and bio font.
Twitter is a fun place to be. With all the latest trends, funny videos, and jokes, the platform makes it hard to leave when you join.
Twitter has over 206 million active monthly users, and definitely, you are definitely one of them, so the question is, how do you stand out?
Twitter is mainly known for tweeting (texts). Although you can share videos and images, you will see more texts when you scroll through your Twitter feeds than the rest, you can also read about how to recover deleted messages from Twitter.
And to make your account stand out, you can decide to write in different fonts. One will ask, why write in different fonts on Twitter? Let’s dive into the benefits of writing in different fonts on Twitter.
Benefits Of Writing In Different Fonts On Twitter
Increases Followers
As you already know, everyone on Twitter uses the same font, so when you decide to tweet and reply to comments with different fonts, you are going to stand out, this will make people want to follow you so that they can see more of your tweets and your fonts. Also, note that it’s easy to make money on Twitter if you get followers, and getting more followers also involves creating better tweets and threads.
Gives You More Visits
Aside from increasing your followers, people are going to visit your profile. This will make Twitter recommend your profile to many people because they will see your account is engaging.
People Will Tend To Engage On Your Tweets
When your fonts are different, they will catch the eyes of many users. Some will want to read more of the fonts. Some will comment, like, and retweet because your tweets stand out. Others will comment and ask you how you did it.
So How Do You Write In Different Fonts On Twitter?
Now let’s dive into how to stand out on Twitter by making your Username and tweets stand out with different fonts.
You will see a field asking you to Type Your Text, now type in what you want to post on Twitter. It could be a tweet you want to make or a reply to someone’s tweet.
Now go through the fonts. When you get the one you like, click on Copy.
Now head over to Twitter, click on the What’s Happening Tab or your bio, and if you want to reply to a tweet, locate that tweet.
Now paste your copied text and Hit the Tweet/Reply/Save button (depending on what you are doing with the font)
After your tweet goes live, you will see your fonts being different from the normal ones on the app.
But what if you also want to change your Twitter name font? Let’s dive into that one, too, using that same website.
Type in your Username or the new Username you want to use
Go through the available fonts and copy the one you like
Head over to Twitter and select Your Profile
Click on Edit Profile
On your Username tab, paste your copied fonts and click on Save.
But what if you don’t like the fonts you see on Fancy fonts? Well, don’t worry, other sites have fantastic fonts to choose from and with these fonts, all you have to do is visit, type your text or Username, and then copy them. You then head over to Twitter to paste.
You should note when changing your Username or tweeting in different fonts because it is sometimes difficult for people who are blind or have low vision to see it.
Conclusion
Now you don’t have to worry about making your fonts different on Twitter. Many sites allow you to convert your text to any fonts you like.
In this article, we covered how to write in different fonts on Twitter. These fonts can be applied to your Username, bio, and even your tweets.
This guide is going to take you through how to bold a text in the Telegram app, in addition, you will also get to know how to make a text italic, underline, and strikethrough a text in Telegram.
Often, we might want to make our text stand out, maybe to let the reader see or notice an essential part of our message. In this case, we then decide to bold that particular part so that the person reading will see that part first.
Telegram is undoubtedly one of the best messaging apps we have right now. The platform has so many features that make it stand out from other messaging apps.
Even WhatsApp, which is known to be the number one messaging app, is still behind in features integrated Into an app.
When it comes to formatting a text, Telegram allows you to change your text format to any way you want.
There are three ways to change the formatting of your text in Telegram, and they are:
Using the Hotkey combination involves utilizing some combination of keys that will help you bold, italic, and underline a text.
Now let’s dive into how to bold a text, I am sure since you want to know how to bold a text, you might also be looking for how to underline a text, Italic and strikethrough. Don’t worry. This article is going to cover all.
How To Bold A Text In Telegram
Launch your Telegram app
Open the contact you want to send in that unique text format.
Type in your text
Long press on the text to select all
You will see a pop-up. Select Bold to bolden all the selected text.
Maybe you are using Telegram on your desktop. How do you bold a text on your telegram desktop?
How To Bold A Text On Telegram Desktop
To bold a text on the desktop, type the text you want to bold
Use your mouse to select all the text you want to bold
Right-click on the text
Select Formatting
Now select Bold to make your text bold.
Alternatively, you can use the keyboard to bold a text by selecting the text and clicking on the control/cmd+B.
How To Italic A Text In Telegram
On your Telegram app, type in the text you want to format it to Italic
Select the text you want to make italic
Click on the three vertical lines and select Italic.
You can also type in this character__ before and after the text and then send it to make it italic.
How To Underline A Text
To underline a text, select the text you want to underline
Click on the three vertical lines among the pop-up
Select Underline
On the desktop, you can select the text and type control/CMD+U to underline the text.
How To Strikethrough A Text In Telegram
Launch your Telegram app, type in your text
Press and hold to highlight your text
Select the three vertical lines that will pop up
Select Strikethrough
Conclusion
Telegram has made it easy to do almost everything on the app. In this article, we decided to cover how to format a text by taking you through how to bold a text, Italic a text, underline a text, and strikethrough a text.
Telegram, a rapidly growing messaging app, stands out with its array of features that distinguish it from its competitors.
The app is not only free but also user-friendly, though it hasn’t reached the same level of popularity as WhatsApp.
Telegram’s rising popularity can be attributed to its innovative approach, and many users appreciate its desktop messaging features.
Unlike some desktop messaging apps, Telegram is designed to be resource-efficient, consuming less RAM and processing power.
Today, our focus will be on a specific functionality: finding a user ID on Telegram. This process is notably straightforward, contributing to the overall user-friendly experience offered by the platform. Let’s delve into the details of how to locate a user ID on Telegram.
How To Change Telegram ID
There are two IDs on Telegram and they are the Telegram ID and the Telegram user ID. The Telegram ID is the name that you chose yourself. If you wish to change the Telegram ID,
Go to the three horizontal line menu
Go to settings
Choose ‘edit profile’
Click on your name
Now change it to whatever name you want
On your mobile device, just click on the vertical dots at the top of the menu and then proceed to change your name.
How To Search For A User ID On Telegram
However, when it comes to finding your Telegram ID, that is a bit different. The good thing is that the steps you will use in finding the user ID on your desktop are the same for the mobile app as well. Please follow the steps below carefully.
Go to the Telegram app
In the search bar, type in ‘@userinfobot’
Tap on it and then choose ‘start’ located at the bottom of the chat interface
The bot will then show you your user ID along with your first name, last name, and language of choice
The bot can repeat the command. All you have to do is to tap on ‘start’ once again for it to repeat the command and display your user ID.
Conclusion
If you found the article helpful, feel free to leave your feedback in the comments. I’m here to assist you with any further questions or topics you’d like to explore. Happy messaging on Telegram.
For more Telegram tutorials, you can check out the best Telegram channels for stock traders, and how to manage an anonymous Telegram group, there are many ways to take a backup on Telegram, and here is how to go about it.
If you also want to stay anonymous or use a proxy for certain reasons, this article is also going to take you through how to set up a proxy for Telegram.
Upon downloading the Telegram app for your PC and engaging in conversations where images have been shared, you might be seeking guidance on locating these images on your desktop.
While Telegram has garnered popularity, understanding the process of finding shared photos in the desktop version remains a challenge for many.
Telegram offers the flexibility of using a single account across various platforms, including smartphones, laptops, and tablets.
This synchronization enables users to access all received documents across their devices seamlessly, using only their phone number for verification.
However, the precise location of these documents can be elusive. In this article, we will provide a professional guide on how to locate images and documents within the desktop version of the Telegram app, ensuring a streamlined experience for users.
How To Locate Telegram Images And Files On Desktop
First of all, you can see the files when you click on them in the Telegram app, which is the easiest way to look at them.
However, you want to transfer them from your computer with a USB cable. In this case, you will need to know where they are. Please follow the steps below.
Open your file explorer
Go to the downloads folder and open it
Here, you will be able to see all the files that have been downloaded onto your computer. However, you will also see another folder titled ’Telegram desktop’. Double-click on this folder to open it
Inside it, you will find all the images and documents that have been sent through your Telegram desktop app.
You should also note that the moment you install the Telegram app on another computer and open a chat, all the files and documents will be downloaded again onto the new computer. This will help to make sure that you have all the documents in your Telegram that you need.
Conclusion
This concludes the guide on locating documents sent to you through your desktop Telegram app. As demonstrated, the process is straightforward, making it easily accessible.
I trust that this article has provided valuable assistance. For more informative content, please stay tuned for upcoming articles.
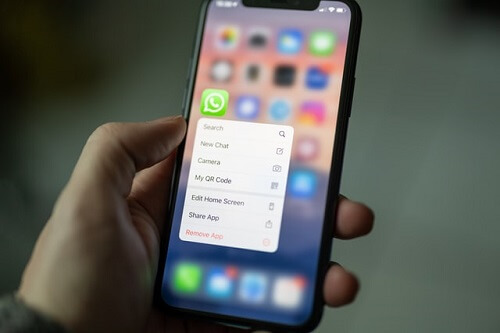
WhatsApp, being the most widely used messaging app globally, has become a staple on smartphones. Despite not being preinstalled, almost every smartphone user has the app on their device.
Owned by Mark Zuckerberg’s Facebook, WhatsApp was acquired for over $19 billion from its original creators and boasts around 1.5 billion active users worldwide.
The app has evolved under Facebook’s ownership, regularly introducing new features through updates. In this discussion, we’ll delve into a specific aspect: retrieving deleted messages on WhatsApp.
This situation may arise when someone sends you a message and deletes it before you read it or if you accidentally delete an important message. We’ll explore the methods to restore deleted messages on both IOS and Android.
It’s crucial to note that you can only recover messages from backups. Consequently, any messages received after your last backup will be irretrievable. Now, let’s examine the steps to recover deleted messages.
Local Storage
You can recover deleted messages from your local storage. Please follow the steps below.
Go to your settings, to WhatsApp, and then to the database. This is where all the backup files are stored locally on your phone.
Go to ‘msgstore.db.crpyt12’ and long press on it. Rename it to ‘msgstore_backup.db.crypt12’. this will prevent it from being overwritten
Now, choose the recent backup file and rename it to ‘msgstore.db.crypt12’
Now, go to your google drive and tap on the three vertical lines. This can be found on the top right corner
Now, uninstall your WhatsApp and then install it again. You will be asked to restore messages from local storage during the installation since there is no cloud storage now
Choose ‘msgstore.db.crypt12’ and then tap on restore
Your message will then be restored and you would see the particular messages that you lost have returned. Note that this method can only be done on android. So IOS users cannot use this method.
Recovery Via Cloud Storage
You can also recover messages from the cloud if you have allowed cloud backup. Please follow the steps below to see how you can do that. this method can be used on both Android and IOS.
You can now restore your messages from the cloud. You will be asked to restore messages from the cloud and you just tap on ‘restore’ to allow it
Your previous backed-up messages will then be restored from your cloud backup storage. You should however note that messages that came after a backup cannot be restored because they were not backed up yet.
Also, note that messages that came and were deleted after a backup cannot be restored since they did not get backed up.
Conclusion
The methods outlined here involve the reinstallation of WhatsApp as the primary means to recover lost messages.
It’s worth noting that WhatsApp has not implemented a feature allowing direct recovery of deleted messages, as this would conflict with privacy concerns.
As you navigate the steps provided, it’s essential to recognize that these measures are currently the only available options for recovering deleted messages on WhatsApp.
If you found this article helpful or have additional insights, feel free to share your thoughts in the comment section.
Don’t forget to express your appreciation by liking the article. If you have further questions or topics you’d like to see covered, feel free to let me know.
In response to a recent inquiry from a friend regarding the process of backing up messages on an iPhone to iCloud, it came to my attention that there might be individuals unaware of the procedure for backing up iPhone WhatsApp data to iCloud. This article is dedicated to addressing this knowledge gap.
The significance of backing up messages cannot be overstated, as it provides a safeguard for valuable conversations, ensuring accessibility to historical messages.
Moreover, the act of creating a backup facilitates the seamless resumption of WhatsApp activity from the point where one left off, particularly beneficial in scenarios involving the reinstallation of WhatsApp on a mobile device.
For Apple users, there exist two distinct methods for backing up WhatsApp messages to iCloud.
In the subsequent sections of this article, we will delve into a comprehensive exploration of these methods, elucidating the step-by-step procedures to empower users in securing their WhatsApp data through iCloud backups.
By employing this method, users establish a direct link between their WhatsApp application and iCloud, facilitating the selective backup of WhatsApp-specific data.
Upon implementing this method, users gain the capability to configure their WhatsApp settings to initiate the backup process for their chats, attachments, and related content onto their iCloud account.
It is imperative to ensure that there is sufficient storage space available on the iCloud account to accommodate the intended backup.
Furthermore, users have the option to activate the automatic backup feature on iCloud. This automation ensures that the backup process occurs seamlessly and without user intervention, enhancing the convenience of regularly safeguarding WhatsApp data on the iCloud platform.
Now, please follow the steps below to learn how to back up your WhatsApp messages to iCloud.
Open your WhatsApp and go to settings, to chat, and then to chat backup
To do an immediate backup of your chats, choose ‘back up now. If you have not linked your WhatsApp to your iCloud account, you will be prompted to sign in to your iCloud account. You can choose to include or exclude videos in the backups.
To activate automatic backups, go to ‘auto backup’ and select your desired backup frequency to be daily, weekly, or monthly.
The Second Method – Add WhatsApp To Your iPhone Backup
You can also backup your entire iPhone smartphone to your iCloud account with your WhatsApp included. This method includes your pictures, videos, docs, notes, and many other things on your iPhone.
However, before going ahead with this, you may need to purchase more iCloud space from Apple since, by default, apple only gives you 5GB worth of iCloud space. To use this method, please follow the steps below.
Open your iPhone device and go to settings, to iCloud.
Go to back up and activate the backup feature there.
You can also view the apps that will be included in the backup to your iCloud account. Scroll down to make sure that your WhatsApp is included. If it is not, enable its option.
You can also prevent some apps from being included in the backup by disabling their backup option.
And with this, you are done. Your WhatsApp is now included in the device backup of your iPhone automatically.
Conclusion
The process of backing up your WhatsApp chats and data to iCloud is elucidated through the two methods outlined above.
The first method allows for the selective backup of WhatsApp data, isolating it from other device content.
Alternatively, users may opt for the second method, involving the comprehensive backup of the entire device, a prudent choice for individuals who routinely store crucial documents on their phones.
The decision between these methods hinges on individual preferences and the specific requirements of users.
Choosing the appropriate method ensures a tailored approach to data backup, aligning with the user’s priorities.
By following the steps provided in this article, you now possess the knowledge to successfully back up your iPhone WhatsApp data to your iCloud account.
If you found this article beneficial, we invite you to explore more comprehensive coverage of iCloud-related topics on our website.
There are times when you want to read a message that was sent by someone who does not want to reply.
You just want to read the message to see what they want or what they are trying to tell you and then go about your day because such people do not deserve a reply from you.
However, how do you do that when your messaging app, which is Telegram allows the sender to see if you have read the message or not? This is exactly what you are trying to avoid. You do not want the sender to see that you read the message.
The good news is, there is a way to go about this. In this article, I will be showing you how you can read messages on telegram. There are some tricks you can employ to achieve this goal. We are going to look at some ways through which you can read your telegram messages without it showing that you have read them.
The Lock Screen
Of course, one of the most common ways to read a message without the sender knowing is by doing so on the lock screen.
To do this, you should first make sure that you have enabled notifications displayed on the lock screen and that the messages are not hidden.
On Android
Go to the application configurations
Touch the icon with the gear which can be seen on the home screen
Go to notifications and under sound and notifications, tap on the screen lock
Now make sure to select the option ‘show all notifications’ and then tap on the ok
Now, under notifications ‘audio and notifications’ tap on applications and then on telegram
Make sure that the switch on ‘block’ has been put off
After this, you will now be able to read messages from Telegram directly on your lock screen without having to open the app.
On IOS
If you are using an IOS device, the same method can be used there as well. You will be able to read the telegram messages.
The only downside of this method is that you should not later go and open the message else the sender would then know that you have read the message.
Notification Dropdown
You can also read telegram messages secretly through the notification dropdown.
Android
To do this on Android, please follow the steps below.
Go to settings
Then over to notifications and audio and applications
Tap on telegram and switch off ‘block notifications’
This procedure would be quite the same on other Android devices out there. After this, you will now be able to read telegram messages by drawing down the notification panel and the sender will not know if you have read it or not.
In IOS
On IOS, the messages can be read from the notification center but telegram notifications will have to be enabled first and this can be done by following the steps listed for Android above.
After you are done with that, please follow the steps below as well.
Go to application configurations
Touch the icon with the gear which is on the home screen
Tap on notifications and then tap n Telegram
Besides ‘enable notifications’ toggle the switch on
Now go to screen lock and then to notifications center and flag
Tap on ‘show previews’ and choose ‘always’
You will then be able to read all telegram messages on the notification center without having to open the app for the sender to know that you have read it.
Google Assistant
This can be used by Google Assistant to read the messages and it can be found on both Android and IOS.
To use Google Assistant for this, open it and say “Read the last telegram messages I received” Google Assistant will then read your newest telegram messages to you and also tell you who the sender was. It will also ask if you are willing to reply to the message.
Crab
IOS users can also use Crab to read telegram messages. Using this is just like using Google Assistant.
You will have to open Siri and then say “Read the last telegram messages I received” and it will read them for you along with the name of the sender.
Conclusion
Through methods, you can read telegram messages and not worry about the sender knowing that you have read them.
WhatsApp has made it easy for us to connect with our loved ones by messaging them and, In addition, allowing us to create groups so that we can all join for our various purposes.
Some families have a single group that everything happens inside. Friends too can have a WhatsApp group that they use to communicate with each other.
There are also groups that people join to learn things based on the title of the group.
You might be asking, but WhatsApp can not see our chat. Yes, you are right. WhatsApp can not see the conversations between groups chats on WhatsApp because WhatsApp is end-to-end encrypted.
Here is how they used to know what was happening in groups and decide if it needed closing.
WhatsApp can determine if a group needs closing by going through the number of times different users have reported the group or when the group has suspicious information such as illegal names and group descriptions.
When this happens, the group will then be manually or automatically ended. When a group is ended, participants will not be able to send and read messages in the group again. One thing they can not do is see their fellow participants.
But you know we all make mistakes, and WhatsApp has taught us about this too. When you find out your group has ended and you think it was closed by mistake, WhatsApp has made it easy to contact support. You can find the Contact Support feature right in the ended group. You can then contact support and request a review.
To be on the safer side so as not to lose your precious group, you have to take extra security steps, which as changing some of your group’s privacy settings.
You can choose not to allow anybody to change the name, description, and logo of the group.