Author: pro

  • How You Can Get More Channels To Watch On Your Multi TV

    How You Can Get More Channels To Watch On Your Multi TV

    Upon the successful setup of your multi-TV dish and decoder, if you desire to expand your channel options for an enhanced entertainment experience, there is a viable solution.

    The signals received by your decoder originate from the Astra 2B satellite, situated at coordinates 28.2E.

    It is crucial to note that multi-TV is not the exclusive broadcaster utilizing this satellite.

    Consequently, you have the opportunity to introduce additional parameters to your satellite receiver.

    This adjustment allows the detection of other signals, thereby augmenting the number of channels accessible through your multi-TV system. Let’s delve into the steps required to initiate this process.

    Getting More Channels For Your Multi TV

    To get everything started, enter the following to get you more channels. 

    Multi RV- 12525- 30000 as the symbol rate

    The above option means that you will be getting 23 TV and 3 radio stations. Also, you can rescan your multi-tv digital box to allow you to get the additional channels that you are looking for without new frequencies. Follow the steps below to do that.

    1. Press the menu button on the remote of the multi tv
    2. Choose ‘installation’
    3. Choose ‘install satellite’
    4. Press ‘ok’
    5. Now press the green button found on the remote

    The Digibox will then start rescanning automatically. After it finishes the scan, you will get more channels as well as radio stations on your multi-TV. You will see that UTV has been added to your channels.

    How To Activate Multi HD TV

    If you want to access a multi-HD TV account, you can do so by just following the steps that have been laid out below. 

    1. Dial *879#
    2. Choose 1 to get your free trial started
    3. Choose option 5 to get the account number of the HD+
    4. Type in the first 6 digits of the HD+ number that you get
    5. Press 1 to confirm the number
    6. Choose 1 to get the HD+ account activated
    7. After this, a confirmation number will be sent to you

    Upon successful activation, your Multi-TV HD account will be fully operational, allowing you to enjoy a variety of programming.

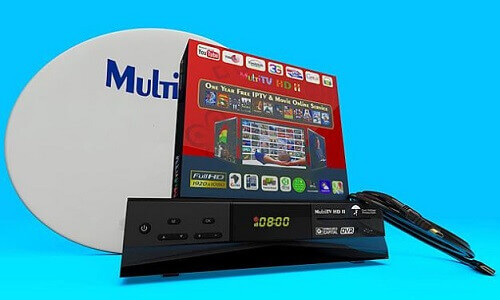
    For the installation of TV satellites, Multi-TV follows a similar principle. To ensure accurate signal reception, you need to input specific satellite tracking parameters.

    The frequency for Multi-TV is set at 12525. When positioning the multi-satellite dish during installation, it is essential to orient it facing east to optimize signal reception.

    To access additional channels, perform a Digibox scan and input the correct frequency number.

    A well-installed multi-TV setup should provide access to over 15 channels and 10 radio stations.

    Here Are Some Popular Multi TV Channels

    • Joy prime
    • Adom tv
    • Joy news
    • Rock tv
    • Sweet tv
    • OB tv
    • Pent tv
    • TVT
    • Ghana tv
    • Aseda tv
    • Cross tv
    • Tv3 Ghana
    • ZTV Ghana
    • Precious tv
    • Fire tv2

    Here Are Some Popular Radio Stations On Multi Tv

    • Joy 99.7
    • Asempa 94.7
    • Citi FM
    • Atlantis radio
    • Radio kara
    • Radio Lome
    • Kessben FM
    • Peace 104.3
    • Hitz 103.9
    • Nhyira 104.5
    • Angel 96. FM

    Conclusion

    For those seeking to expand their channel selection on Multi-TV due to the current options being less engaging, this article has provided valuable insights into the process.

    It’s crucial to ensure that the satellite dish is correctly oriented towards the east, as this is the direction from which all signals originate.

    By following the outlined steps, you can enhance your multi-TV experience with a broader array of channels.

    You can also check out other related articles such as multi-tv price in Ghana and how to reset the DStv remote.

  • History Of The Apple IOS Operating System

    History Of The Apple IOS Operating System

    The iPhone, crafted by Apple, has emerged as one of the most popular smartphones globally over the past decade. It has become the preferred choice for many individuals around the world.

    Powering the iPhone is the iOS operating system, exclusively designed by Apple for use in iPhones and other Apple devices.

    Unlike other operating systems, iOS is proprietary to Apple, and the company does not permit its use by other manufacturers. This exclusivity contributes to the premium pricing of iPhones compared to average smartphones.

    In this article, we will explore the various iOS versions that have been developed since the inception of the iPhone.

    IOS 1


    Certainly. Here’s a refined version of your passage:

    The inaugural version of iOS, released by Apple, made its debut on June 29, 2007. The final version was subsequently released on July 15, 2008.

    Packed with features, this version included a camera, calendar, photos, Safari browser, notes, phone, mail, iPod, videos, music, and more.

    Additionally, it was compatible with the iPod Touch, establishing the foundation for subsequent iOS iterations.

    IOS 2

    The second version of the iOS operating system was initially released on July 11, 2008, with the final version arriving on January 27, 2009. Apple concluded support for this OS in 2011.

    This iteration marked a significant milestone as it was the first to introduce third-party applications.

    It boasted several additional features compared to its predecessor, including text, the App Store, settings, calculator, weather, stocks, maps, iTunes, and more.

    The inclusion of third-party applications expanded the functionality and versatility of iOS during this phase.

    IOS 3

    iOS 3, the third installment in the iOS lineup, was unveiled on June 11, 2010, with its final version released on August 11, 2010. Apple concluded support for this iOS version in 2012.

    This iteration introduced significant features, including the ‘Spotlight’ and ‘Search’ indexing features, designed to facilitate easy information retrieval for iPhone users.

    Building on the features of its predecessor, iOS 3 also added new functionalities such as YouTube and Voice Memos.

    Notably, users could now record videos and utilize the ‘copy and paste’ feature.

    IOS 4

    Following swiftly after iOS 3, iOS 4 was released on June 22, 2010, with its final version becoming available on July 25, 2011. Apple discontinued support for iOS 4 in 2013.

    This version introduced notable enhancements, including the ability to create folders on the home screen and an increased limit on displayable apps.

    New features encompassed spell check functionality and improvements to the camera, Safari browser, and home screen, contributing to an enhanced user experience.

    Key features of this IOS are 

    1. Multitasking
    2. AirPrint
    3. iBooks
    4. Airplay
    5. Facetime
    6. Personal hotspot

    IOS 5

    In response to the burgeoning growth of cloud computing, Apple introduced iOS 5, a revamped operating system that brought forth a myriad of new features.

    Notably, iOS 5 was the first to incorporate iCloud capability, showcasing Apple’s commitment to cloud-based services.

    The introduction of the Newsstand feature and the debut of Siri, Apple’s virtual assistant, were also noteworthy aspects of this release.

    Notable features are

    1. Imessage
    2. iCloud  
    3. notification center
    4. wireless syncing

    IOS 6

    Certainly. Here’s a refined version of your passage:

    iOS 6 made its debut on September 19, 2012, with the final version released on February 21, 2014. Apple concluded support for this version in 2015.

    Key features introduced in iOS 6 included Passbook, Apple Maps, and the ‘Do Not Disturb’ functionality.

    IOS 7

    Certainly. Here’s a refined version of your passage:

    iOS 7 shifted its focus to the user interface, introducing a host of features including Airdrop, CarPlay, Touch ID, Activation Lock design, Control Center, and more.

    It was initially released on September 18, 2013. This version marked a significant visual and functional overhaul of the iOS user experience.

    IOS 8

    iOS 8 was initially released on September 17, 2014, with the final version made available on August 13, 2015.

    Notably, Apple continues to support this operating system. The introduction of key features such as Spotlight, Continuity, Apple Pay, iCloud Drive, Family Sharing, Handoff, and support for third-party keyboards marked significant advancements in iOS functionality during this phase.

    IOS 9

    The 9th edition of iOS was released on September 16, 2015, bringing significant improvements over its predecessor.

    New features introduced included Low Power Mode, Night Shift, and the initiation of the Public Beta Program. Notably, Apple continues to support this operating system to date.

    IOS 10

    iOS 10, released on July 19, 2017, brought significant changes, including the incorporation of 3D Touch and enhancements to the lock screen.

    The image recognition capabilities of iOS 10 garnered praise from reviewers. Noteworthy features of this release included iMessage apps and the ability to delete built-in apps.

    The final version was released on September 13, 2016, and Apple continues to provide support for this operating system.

    IOS 11

    The next iteration of the Apple operating system, iOS 11, was unveiled on September 19, 2017, introducing significant customization and interoperability features.

    Notable enhancements included a display option on the lock screen, the introduction of AirPlay 2, and augmented reality capabilities.

    It’s important to note that iOS 11 is still actively supported by Apple.

    IOS 12 

    The IOS 12 is the latest version of the mobile operating system from Apple and it was released on 17th September in 2018. It came with several key features such as,

    1. Grouped notification
    2. Group facetime
    3. 70 emojis
    4. Battery improvement
    5. Arkit 2.0
    6. QR code
    7. Screen time
    8. Apple tv
    9. Portrait mode that has been updated

    Conclusion

    In summary, these represent the various iterations of the Apple iOS operating system developed over the years. We invite you to share the current iOS version running on your iPhone in the comments section below. Your insights are valuable to us.

  • Infinix Note 8 Review, Specs, Price In Ghana And Purchase Points

    Infinix Note 8 Review, Specs, Price In Ghana And Purchase Points

    Are you in search of the current pricing information for the Infinix Note 8 in Ghana?

    If so, this article aims to provide you with comprehensive details, including the price, specifications, and recommended purchase locations.

    Continuing with your reading will furnish you with the precise pricing of the Infinix Note 8 across various retail outlets, enabling you to make an informed decision on where to acquire it at the most favorable cost.

    In late 2020, Infinix unveiled its latest range of smartphones, generating significant anticipation from a global audience of tech enthusiasts and potential buyers.

    Among the newly introduced devices were the Infinix Note 8 and the Infinix Note 8i, both boasting advanced features that position them as formidable contenders in the competitive smartphone market.

    The official unveiling of these smartphones took place on the 4th of November 2020, and since then, they have garnered attention for offering impressive functionalities without requiring a substantial financial investment.

    This article specifically delves into an in-depth exploration of the Infinix Note 8, highlighting its noteworthy features and demonstrating why it stands out as a commendable choice for individuals seeking a high-performing smartphone without a hefty price tag.

    Here Are Some Features That Makes The New Infinix Note 8 An Extraordinary Phone 

    • The new Infinix Note 8 comes with a large 6.95-inch IPS LCD touchscreen with a resolution of 720 x 1640 pixels for people who like to watch their videos big. 
    • It sports a MediaTek Helio G80 chipset and a Mali G52 MC2 GPU with an adequate 6GB RAM. Storage space is pretty enough with 128GB worth of it. 
    • On the technology side, the Infinix Note 8 comes with GSM, HSPA, and LTE options. It comes with a dual SIM capability, Nano-SIM, and dual standby. 
    • The new Note 8 comes in several beautiful colors, such as grey, green, and blue.
    • The new Infinix Note 8 uses a non-removable powerful 5200 mAh battery with a fast-charging 18W. 
    • The operating system is an Android 10.0 and an XOS 7.1 with a user interface. The new Note 8 comes loaded on the camera side to give clear-quality photographs. It comes with a quad-camera with 64 megapixels, a quad-LED flash, panorama, and HDR. 
    • The inner or selfie camera is also made up of 16 megapixels and a 2 2-megapixel depth camera. The smartphone has been integrated with a loudspeaker and also comes with a 3.5mm headphone jack.
    • The Infinix Note 8 comes with Bluetooth 5.0, radio, USB type-c 2.0, USB on-the-go, and GPS with A-GPS in terms of connectivity and sharing. It also comes with a side-mounted fingerprint scanner, gyro, proximity, accelerometer, and compass, which should be an ideal addition for people who usually go on hiking or traveling. 

    Infinix Note 8 General Specs

    The Infinix Note 8 boasts a large and vibrant 6.95-inch IPS LCD featuring a capacitive touchscreen for a responsive user experience.

    With a resolution of 720 x 1640 pixels and support for 16 million colors, the display delivers sharp visuals and a wide range of hues.

    The pixel density of 248 PPI ensures clarity and detail in every image or text displayed on the screen.

    Powering the graphics is the Mali-G52 MC2 GPU, contributing to a smooth and visually pleasing performance.

    Under the hood, the device is equipped with 6 GB of RAM, facilitating seamless multitasking and efficient operation.

    The generous 128 GB of internal storage provides ample space for apps, files, and media, with the added convenience of a micro SD slot for expanding storage as needed.

    Running on Android 10 and featuring XOS 7.1 with a user-friendly interface, the Infinix Note 8 offers a reliable and customizable software experience.

    Photography enthusiasts will appreciate the impressive camera setup. The rear camera configuration includes a 64 MP wide lens, accompanied by 2 MP macro and 2 MP depth sensors for diverse and detailed photography.

    On the front, the 16 MP selfie camera, coupled with a 2 MP depth sensor, ensures quality self-portraits.

    The device supports Nano-SIM and Dual SIM capabilities, catering to varying user preferences.

    In terms of connectivity, the Infinix Note 8 offers WiFi, USB Type-C 2.0, USB on-the-go, Bluetooth, and GPS with A-GPS, ensuring a comprehensive range of options for staying connected and sharing data.

    In summary, the Infinix Note 8 combines a sizable and high-quality display, robust internal specifications, and an impressive camera system, making it a compelling choice for users seeking a feature-rich smartphone experience.

    Where To Get The Infinix Note 8 In Ghana

    The newly released Infinix smartphones are available in Ghana, and you can purchase them from several online smartphone shops. 

    Some of the online phone shops where you can buy a new smartphone are:

    • Francotrading.com
    • Superlovek.com
    • Superprice.com
    • Jumia.com

    Infinix Note 8 Prices In Ghana

    infinix note 8 Ghana

    The new Infinix Note is a smartphone that certainly does not break the bank to acquire. 

    The smartphone has an attractive price that almost anyone can afford. 

    The costs for the Infinix Note 8 vary according to the different smartphone shops. We have, however, taken it upon and listed the prices here for you.

    • Jumia price- GHS 1,200
    • Franco trading price- GHS 1,099
    • Superlovek price- GHS 1,099
    • Super price- GHS 1,099

    Conclusion 

    Consider the Infinix Note 8 as your next smartphone, boasting extraordinary features that are sure to capture your interest and enhance your overall mobile experience.

    This article meticulously explored the notable features of the Infinix Note 8, providing valuable insights into its specifications, pricing details in Ghana, and a comprehensive overview of the costs across various retail outlets in the country.

    From its impressive 6.95-inch IPS LCD with a capacitive touchscreen to the powerful 64 MP wide rear camera and the efficient 6 GB of RAM, the Infinix Note 8 stands out as a compelling choice in the smartphone market.

    The device offers a generous 128 GB of internal storage, expandable through a micro SD slot, ensuring you have ample space for your apps, files, and media.

    Notably, the Infinix Note 8 runs on the Android 10 operating system, complemented by the XOS 7.1 user interface, delivering a reliable and customizable software experience.

    The inclusion of Nano-SIM and Dual SIM support caters to diverse user preferences.

    To facilitate connectivity, the Infinix Note 8 comes equipped with WiFi, USB Type-C 2.0, USB on-the-go, Bluetooth, and GPS with A-GPS, ensuring you stay seamlessly connected in various situations.

    Whether you are captivated by its large and vibrant display, powerful camera capabilities, or robust internal specifications, the Infinix Note 8 emerges as a standout choice for those seeking a feature-rich and competitively priced smartphone in the Ghanaian market.

    If you are also into Tecno phones, we have an article covering the price of Tecno Spark 7 In Ghana, you might want to check it out.

  • How To Turn Off The Google Assistant With Your Voice Or Manually

    How To Turn Off The Google Assistant With Your Voice Or Manually

    In cinematic depictions such as the Iron Man and Avengers franchises, we witness Tony Stark’s utilization of highly intelligent artificial intelligence to seamlessly control and command his technological creations, including the iconic Iron Man suits.

    In these narratives, Stark’s AI, akin to an obedient and capable assistant, responds promptly to his verbal instructions, epitomizing a level of automation and efficiency that transcends manual input.

    While our current reality may not boast the same level of sophistication portrayed in these movies, we do possess a noteworthy counterpart: Google Assistant.

    This artificial intelligence-powered virtual assistant, analogous to Siri in iPhones, is a creation of Google designed to enhance user interactions with its products across the digital landscape.

    Google Assistant functions by responding to voice commands, enabling users to control devices and perform searches effortlessly.

    Activating it is as simple as uttering the phrase “Ok, Google,” followed by the desired command.

    This functionality significantly streamlines the usage of Android smartphones and devices, providing a hands-free and convenient experience.

    It’s worth noting that, similar to the cinematic portrayal, there can be instances where Google Assistant activates itself without explicit commands.

    While this may be perceived as an inconvenience, users have the option to deactivate it if they prefer not to utilize this feature.

    This blend of artificial intelligence and voice command technology marks a noteworthy step towards a future where our interactions with technology become increasingly intuitive and responsive.

    How To Turn Off Google Assistant

    1. On an Android device, say “Hey Google, open assistant settings” Under ‘all settings’ tap on ‘general’
    2. Turn the Google Assistant off
    3. If you cannot talk, you can use this alternative method to turn it off
    4. Open the Google app and then tap on ‘more’. This appears as three dots inside the toolbar
    5. Now tap on ‘settings and then go to the assistant section
    6. Under the ‘assistant device’ choose ‘phone’
    7. Now, switch it off by tapping on the toggle.
    8. There will be a message telling you that some features cannot work if you turn it off. Just tap on ‘turn off’ to proceed. 

    How To Make Google Assistant Recognize Your Voice

    To enable Google Assistant to recognize your voice seamlessly, follow these straightforward steps:

    1. Utter the command, “Hey Google, open assistant settings.”
    2. Within the settings menu, navigate to ‘popular settings,’ and subsequently, tap on ‘voice match.’
    3. Maintain the activation phrase “Hey Google” and proceed to select ‘voice model.’
    4. Opt for ‘retrain voice model’ to initiate the process of refining and enhancing the recognition of your unique vocal patterns.

    By diligently following these steps, you ensure that Google Assistant is finely attuned to your voice, enhancing the accuracy and effectiveness of your interactions with this artificial intelligence-powered virtual assistant.

    Conclusion


    The Google Assistant serves as a valuable tool, greatly simplifying the utilization of your smartphone. However, if you prefer a more manual approach to device management, you can easily disable it by following the steps outlined in this article. You can also check out how to change your google account’s profile picture.

  • The Right Ways To Back Up iPhone To Mac

    The Right Ways To Back Up iPhone To Mac

    In the contemporary world, our lives revolve around electronic gadgets, with smartphones being central repositories of crucial information.

    Losing a smartphone can be equivalent to losing valuable data, causing significant distress, especially for those who store sensitive information such as documents, PIN codes, and bank details on their devices.

    For Apple users, safeguarding this information involves understanding how to back up data on an iPhone.

    Apple provides three primary options for backup: iTunes, iCloud, and various third-party applications. It’s important to note that each option comes with its own set of advantages and disadvantages, but all serve the common purpose of securely preserving a backup of your information.

    Now, let’s delve into each of these backup options and explore how you can utilize them to protect your data effectively.

    Understanding the intricacies of each method empowers Apple users to make informed choices based on their preferences and needs.

    Through Simple Method

    To safeguard the data on your iPhone, you have two primary methods for creating backups: wireless backup or using a USB sync cable.

    Once you’ve made your choice between these options, you can proceed with the backup process through reputable platforms such as iTunes, iCloud, or third-party software. These methods ensure the secure storage of your valuable information.

    Back up iPhone To Mac Without A Cable (iTunes)

    The first method, which is the use of iTunes, allows you to back up your information to Mac without the use of a USB sync cable.

    This is done through the iTunes wireless functionality. Follow the simple steps below to use this feature.

    1. Go to settings
    2. Choose general and then iTunes
    3. Go to wifi sync
    4. Choose ‘mac’ from the list

    After this, you will see that there is another option ‘sync now’. Remember that your iPhone will start syncing automatically if the screen is locked while the phone has been connected to a wifi network and source of power.

    The files through the iTunes backup will be stored on your Mac computer so you should make sure that there is enough space.

    Although the iTunes option is good, it has its fair share of drawbacks. One of these drawbacks is the limitation of space.

    iCloud

    An additional alternative for your backup requirements is iCloud, which offers a substantial 2 terabytes of cloud storage.

    While this may initially appear extensive for storing photos and documents, it’s important to recognize that this space can be depleted over time.

    Notably, only 5 gigabytes are allocated to free users, necessitating payment for access to the full 2 terabytes.

    All files backed up to iCloud benefit from encryption, and restoration can be conveniently executed through wifi networks.

    The flexibility of iCloud stands out as an advantage, allowing backups from any location with wifi access.

    It’s crucial to bear in mind, however, that duplicating information already stored in a different iCloud account is not supported.

    This underscores the need for thoughtful consideration when managing your backup strategy.

    Follow the steps below to back up to iCloud 

    1. Have a connection to a wifi network
    2. Go to settings
    3. Select your name
    4. Choose ‘iCloud’
    5. Choose ‘iCloud backup’
    6. Choose ‘backup now’

    The backup process will start automatically so you should make sure that the iPhone is connected to the wifi network until the backup is done.   

    Third-Party Apps

    This process does not entail the use of a dedicated app; instead, it involves manually connecting your iPhone to your Mac and transferring files directly.

    Upon completion, you will observe the creation of a duplicate set of your files on your Mac. It’s essential to note that, unlike the iCloud or iTunes methods, this approach imposes limitations on the quantity of files you can back up.

    This manual method provides a more selective backup option, allowing you to prioritize specific files or data sets during the transfer process.

    Frequently Asked Questions

    Can I encrypt my backup files on a Mac?

    All the files that you back up to iCloud are automatically encrypted. You can also encrypt on iTunes back up although this is normally turned off by default.

    How many times can I back up my files?

    You can make a backup every day by setting your device up for that. follow these steps
    Keep iCloud backup turned on
    Have your iPhone connected to a wifi network
    Switch the screen off and connect to a power source

    How much do I need to pay for full access to iCloud storage?

    iCloud storage plan starts at $0.99 per month and that gets you 50GB   

    Conclusion

    Please keep in mind that this article does not mean that you should not seek professional advice, especially regarding the pricing of the iCloud storage plans. You can also check out how to sync contacts between iPhone and Mac.

  • Linking Your NIA Number To Your SSNIT, Here Is How To Go About It

    Linking Your NIA Number To Your SSNIT, Here Is How To Go About It

    As you are likely aware, a notable development has taken place concerning the National Identification Authority (NIA) numbers and Social Security and National Insurance Trust (SSNIT) numbers in Ghana.

    The recently introduced NIA cards, commonly referred to as Ghana cards, are poised to supplant the existing identification numbers utilized by SSNIT.

    This convergence of identification numbers is a direct consequence of Regulation 7 (1) outlined in the National Identity Register Regulations.

    It signifies a pivotal step toward a unified and streamlined identification system.

    Additionally, individuals seeking to enroll in the National Pension Scheme as new subscribers will now be mandated to possess Ghana cards as a prerequisite for membership.

    Consequently, stakeholders and concerned parties are actively engaged in the process of consolidating these identification numbers.

    Various methods have been established to facilitate this merger, ensuring a smooth transition for all involved parties.

    • By visiting an SSNIT office
    • By using a short code which has been provided for that which is *711#
    • Or by using the SSNIT website 

    Here are some of the reasons why you should consider doing the merger if you are not thinking seriously about it.

    • Using the Ghana card for all your transactions
    • Getting easy identification of nominated dependants
    • Saving money to avoid paying SSNIT card
    • A regal requirement

    Requirements For Linking SSNIT Number To Ghana Card Number 

    You will need the following before you will be able to merge both numbers.

    • Your NIA number
    • Your SSNIT number
    • Your mobile phone number
    • An email account that s active

    You will need your Ghana card to find your NIA number. After obtaining the card, look at it and you will see a ‘Personal ID number’ section.

    There, you will find an alphanumeric number that starts like this GNXXXXXXXX. The number is your NIA number and it is the same as the Ghana card number.

    That is the number that will be required when you are merging with the SSNIT number.

    How To Merge The NNumbers With Your Phone

    To carry out the merger, follow the steps listed below. 

    1. Dial *711*9# on your phone dialer
    2. Choose option 1
    3. Input your SSNIT number
    4. Enter your email address
    5. Input the personal ID number that you saw on the Ghana card
    6. Choose option 1 to finish the merger
    7. Wait for a confirmation message to be sent to you

    Do The Merger Online

    1. Go to the official SSNIT members website here https://www.ssnit.org.gh/member/
    2. Use your current SSNIT number and password to log in
    3.  On the top of the bar, you will find ‘merge my NIA’ there, click on it
    4. Make sure you read the terms and conditions before you proceed
    5. Now input your NIA number and confirm your email address and phone number
    6. Now click on submit and wait as the merger completes

    Conclusion

    In this concise article, we’ve explored the convenient process of merging your National Identification Authority (NIA) number with your Social Security and National Insurance Trust (SSNIT) number directly through your mobile device.

    This approach proves more efficient than physically visiting an SSNIT office to accomplish the same task, offering a streamlined and accessible solution for individuals seeking to consolidate their identification information.

  • How To Change The Profile Picture Of Your Google Account

    How To Change The Profile Picture Of Your Google Account

    Let us now explore the process of updating your Google account’s profile picture.

    Recognizing the prevalent demand for a clear, step-by-step guide, we have curated this article for our esteemed readers.

    Google’s profile picture holds prominence across numerous websites and platforms, including Gmail, YouTube, Google Drive, and other products under the expansive Google umbrella.

    This ubiquity stems from Google’s vast presence as a major internet conglomerate, offering users the convenience of utilizing a single Google account across multiple websites.

    The elimination of the need for separate accounts for each website streamlines the user experience.

    Consequently, any alteration made to the profile picture on your Google account resonates across all affiliated websites and platforms.

    To apply a specific image as your Google profile picture, a straightforward process awaits.

    Simply modify the picture associated with your Google profile, and the changes will seamlessly propagate across the entire spectrum of Google websites.

    In the subsequent sections of this article, we will guide you through the intricacies of changing your profile picture on your Google account, ensuring a smooth and unified online identity.

    Let us now take a look at the steps through which you can change the Google profile picture.

    How To Change The Profile Photo Of Your Google Account

    With the following steps, you will be able to change the profile on your Google account with ease. Let us take a look at the simple steps outlined below. 

    1. Go to Google. You can even open the Google search engine homepage
    2. Log into your Google account
    3. In the top right corner of the screen, you can see the profile picture there, click on it
    4. Click on the ‘camera’ icon under the profile photo
    5. In the menu that opens, click on ‘select a photo from your computer’
    6. Now browse through your photos and choose the one that you want to use. Just drag the photo into the window
    7. Crop it to your desired shape after it has been uploaded
    8. Now, click on ‘set as profile photo’

    Now, you will see that the profile photo on your Google account has been changed. This will then take effect after a few minutes on all the other Google products and websites that use your Google account for access. This will include the following:

    Conclusion

    The steps for updating your profile photo on your Google account are remarkably straightforward, requiring only a minute or two of your time.

    It’s crucial to bear in mind that when you make a change to your profile photo on your Google account, this modification extends to various Google products, websites, and applications.

    Therefore, exercise mindfulness during the process, ensuring that the selected profile photo aligns seamlessly with your desired representation across the Google ecosystem.

  • How To Activate Dark Mode On Snapchat

    How To Activate Dark Mode On Snapchat

    Let’s delve into how to activate dark mode on Snapchat.

    If you’ve been enjoying the sleek look of dark mode on WhatsApp and want to replicate that experience on Snapchat, here’s a guide to help you navigate through the process.

    Dark mode isn’t merely a cosmetic feature; it serves a practical purpose.

    It was introduced to alleviate eye strain, especially when using your phone at night.

    The blue and white lights emitted by mobile devices can interfere with sleep patterns and lead to discomfort, including headaches and other issues.

    In response to this, developers across various platforms incorporated dark mode as an alternative to the standard screen.

    Now, let’s walk through the steps to activate dark mode on your Snapchat app, enhancing your experience and reducing strain on your eyes, especially during nighttime use.

    What Is The Dark Mode?

    The Dark Mode feature, also referred to as Night Mode, is a functionality that enables users to alter the color scheme of the application they are using, transitioning it to a darker visual palette.

    Widely prevalent across various apps and devices, this feature serves a practical purpose by facilitating comfortable usage during low-light conditions, particularly at night, without causing undue strain on the eyes.

    Its implementation proves beneficial for users aiming to engage with their phones or specific applications before bedtime, contributing to a more conducive environment for restful sleep.

    It’s noteworthy, however, that while Dark Mode has gained significant popularity, not all apps and devices incorporate this feature.

    Surprisingly, some widely used applications have yet to integrate Dark Mode into their design, indicating that its adoption is not universal across all platforms.

    How To Activate Dark Mode On IOS Snapchat

    Snapchat, a dynamic social media platform renowned for its frequent introduction of innovative features, continues to captivate users with a constant stream of novel additions.

    Among these enhancements are an array of filters and various features that users regularly encounter upon launching the app.

    Notably, in May 2021, Snapchat introduced the Dark Mode feature, a significant addition for users operating the app on IOS.

    Dark Mode provides users with the ability to seamlessly transition the app’s color scheme to a darker, more subdued palette, offering a visually comfortable experience, particularly during nighttime usage.

    This feature aligns with the broader industry trend of incorporating Dark Mode options to enhance usability in low-light conditions.

    IOS users now have the convenience of accessing Snapchat in Dark Mode, contributing to a more enjoyable and eye-friendly experience during nocturnal interactions with the app.

    Follow the steps below to activate the feature on your Snapchat using IOS.

    1. Go to your Snapchat profile
    2. Tap on the ‘gear (settings) icon’
    3. Scroll down till you see ‘app appearances’ and tap on it
    4. Tap on ‘always dark’

    This will activate the dark mode feature on your IOS Snapchat. So if you are using Snapchat on an iPhone or any other Apple device, then you can use the simple steps above to activate the night mode.

    How To Activate Dark Mode For Snapchat On Android 

    Android users can also enjoy the Dark Mode feature on their Snapchat app.

    Android, being the most widely used mobile operating system globally, ensures that such popular features are not exclusive to specific platforms.

    While the official update incorporating the Dark Mode feature may not have been universally rolled out to Android devices, there is an alternative method for users to activate it.

    By navigating to the Developer’s Mode settings and manually enabling Dark Mode, Android users can access this visually soothing feature on their Snapchat app.

    This workaround allows users to benefit from the advantages of Dark Mode, enhancing the app’s usability in low-light conditions.

    Despite the official update pending for Android, this method empowers users to proactively enjoy the benefits of Dark Mode on Snapchat.

    Follow the steps below to get it done:

    1. Go to your Snapchat app
    2. Swipe down and then choose ‘gear’
    3. Tap on ‘display’
    4. And then tap on ‘dark mode’
    5. Go to your phone settings and scroll down to ‘about phone’ tap on it
    6. Choose ‘Software information’
    7. Locate ‘build number’ and then tap on it 6 times in quick succession
    8. A notification will then be sent to you about it
    9. Input your password and code
    10. Return to settings and tap on ‘developer options’
    11. Scroll down and then tap on ‘Force dark mode’
    12. With this, you will have the dark mode running on your Snapchat app.

    Alternative Ways To Access Dark Mode On Android

    In case you cannot go through all those steps or you are afraid of messing with the developers’ settings. There are apps that you can download to get the dark mode effect on any app on your phone. One of such app is known as the ‘Substratum’ app.

    Blue Light Filter’ is another app that can be used for that purpose. Although this app does not add dark mode to your Snapchat, it will allow you to edit the harsh light when you are using the phone at night. 

    Conclusion

    Absolutely, with the Dark Mode activated on your Snapchat app, navigating the platform during nighttime becomes a significantly more enjoyable and visually comfortable experience.

    The subdued color palette reduces eye strain, providing a seamless and pleasant interaction with the app in low-light conditions.

    Whether you’re capturing moments, exploring new features, or connecting with friends, the enhanced visibility and reduced glare offered by Dark Mode contribute to an overall more enjoyable browsing experience on Snapchat, especially during the evening hours.

    You can also check out how to take a screenshot on Snapchat without anybody noticing.

  • Some Home Smart Devices That Every Household Should Try Using

    Some Home Smart Devices That Every Household Should Try Using

    The essence of having a home fundamentally includes the provision of comfort within its confines.

    The home serves as the sanctuary where relaxation is seamlessly attained after a day’s work—a space where family moments are cherished and shared.

    To enhance the overall comfort of your dwelling, consider integrating certain smart devices into your household’s technological repertoire.

    These innovative gadgets can significantly elevate your quality of life, rendering your abode a more comfortable and enjoyable place to reside.

    In the subsequent sections of this article, we will delve into a selection of these smart devices, exploring how their incorporation can transform your home into an even more comfortable haven.

    What Is A Smart Device?

    As defined by Google, smart devices are electronic gadgets typically linked to other devices and networks through various wireless protocols, including Bluetooth, NFC, Wi-Fi, Li-Fi, 5G, and more.

    These devices possess a degree of autonomy in their operations. Smart home devices, on the other hand, are specifically designed to connect with our smartphones and other devices for seamless integration.

    Contrary to a common misconception, the integration of smart devices into your living space does not necessitate opulent wealth or a mansion.

    Many of these innovative gadgets are readily available in technology stores across the country at affordable prices.

    In the subsequent sections, we will explore some of these accessible smart devices and delve into their functionalities, highlighting how they contribute to creating a more comfortable and technologically enriched home environment.

    A Must-Have Smart Home Devices

    Smart Doorbell

    Smart Doorbell

    A valuable addition to home convenience is a smart doorbell. Beyond merely hearing when someone is at your door, a smart doorbell provides the visual advantage of seeing the person knocking.

    Advanced models even incorporate features such as face recognition and motion detection, enhancing the security of your home by allowing you to visually assess and decide whether to grant access.

    Some smart doorbells go a step further, providing announcements when there are individuals outside your door.

    This amalgamation of audio-visual capabilities not only streamlines your home’s security but also adds an extra layer of awareness to your living space.

    Surveillance Camera

    Surveillance Camera

    In our current era, where crime rates are on the rise, prioritizing security is paramount. Safeguarding your family and the fruits of your labor requires a vigilant approach.

    One effective means of bolstering security is through the installation of surveillance cameras around your home.

    These cameras serve as vigilant guardians, keeping you informed about any activity within and around your residence.

    By providing real-time monitoring, they empower you to stay alert to any unauthorized entry, enabling swift and necessary action to protect your home and loved ones.

    Smart Door Lock

    Smart Door Lock

    While it may be humorously labeled as a solution for the “lazy” among us (hahaha), it’s important to note that not everyone utilizing this technology falls into that category.

    The convenience of opening your door with a smartphone, for instance, isn’t about laziness but rather practicality.

    It eliminates the need to navigate stairs simply to open the door for a pet or to greet someone arriving or departing.

    This streamlined approach minimizes unnecessary movements, contributing to a more efficient and comfortable home experience.

    Android TV Box

    Android TV Box

    Essentially, an Android TV box is akin to a television accessory operating on the Android operating system, the same system powering your smartphone.

    It seamlessly incorporates all the applications you use on your smartphone, drawing content from your home network, television, or the internet.

    The process is straightforward: you project your smartphone activities onto the screen of the TV box.

    This integration allows for a unified and versatile entertainment experience, bringing the functionalities of your smartphone to the larger display of your TV.

    Smart Bulb

    smart bulb

    Introducing the Philips Hue light bulbs, an innovative lighting solution designed to be placed throughout your home, available in a diverse array of colors and sizes.

    For those seeking a touch of artistry, there’s even a vintage design variant.

    When you opt for the Philips Hue light bulbs, you also receive the Philips Hue Bridge. This essential component unlocks a plethora of amazing features, enhancing your overall lighting experience with advanced capabilities and customization options.

    FAQs

    Where can I get smart devices to buy in Ghana?

    You can get some of these smart devices from places like Kings reality Ltd in Osu and Elite audio, and video automation in Kumasi.

    Conclusion

    Exploring these smart devices is certainly worthwhile, as they not only introduce style but also elevate the security of your home.

    Many of these devices are available at affordable prices, with some accessible at Vodafone offices and various tech shops across the country.

    Consider incorporating these innovations to enhance both the aesthetic appeal and safety features of your living space.

  • How To Sync Contacts Between iPhone And Mac

    How To Sync Contacts Between iPhone And Mac

    Have you ever considered the seamless synchronization of your contacts between your iPhone and Mac devices?

    In the contemporary Ghanaian landscape, a substantial number of individuals utilize iPhones, often complemented by Mac devices.

    A noteworthy portion of this demographic exhibits a profound affinity for Apple products, extending their allegiance to various electronic gadgets offered by the tech giant.

    Today, we will delve into the intricacies of syncing contacts between an iPhone and a Mac device.

    When contemplating the synchronization of contacts between your iPhone and Mac, there exist multiple methods to achieve this task. Let’s explore three distinct approaches to syncing your iPhone contacts with your Mac device.

    Acquiring proficiency in the process of synchronizing contacts between your iPhone smartphone and Mac device holds significant relevance for users immersed in the Apple ecosystem.

    How To Sync Contacts Between iPhone And Mac

    Here is how you can sync your contacts from iPhone to Mac using iCloud. You will first need to login into the same iCloud account for your iPhone and the Mac.

    1. Go to the settings on your iPhone and then click on your name
    2. Turn on the ‘contacts’
    3. Now, tap on ‘Merge’
    4. On your Mac device, head to the Apple menu that can be found in the top left-hand corner
    5. Change the system preference to iCloud
    6. Now switch on the toggle next to ‘contacts’

    When The Contacts Fail To Sync

     When you are syncing contacts from your iPhone to the Mac, what you should know is that you are syncing both the iPhone and the Mac with iCloud.

    So in case, you get into some trouble while trying to sync the contacts, these are the possible reasons for the trouble that you are facing.

    1. The iCloud storage full – when your iCloud storage gets full, then you will not be able to sync anything with the iCloud. The same goes for contacts as well. What you will have to do is to free up space so that you can sync the contacts
    2. Devices not logged into the same iCloud account – it could be that the iPhone and the Mac are not logged into the same iCloud account. They are probably logged into different iCloud accounts
    3. Syncing of contacts turned off – somehow, it could be that contact syncing has been turned off on one of the devices. This means that the syncing cannot go ahead. 

    Forcing The Contact Syncing, How To Go About That

    You can try forcing the contact syncing to happen through the following ways.

    1. Open the Contacts app on your iPhone
    2. scroll up the screen
    3. pull down with your finger until you see that the activity gear has started to refresh

    if this does not work, try logging out of your iCloud and then log back in again.

    1. Go to the settings on your phone, tap your name and then click on sign out
    2. Restart the phone and then log back into the iCloud
    3. Go to settings
    4. To passwords and accounts
    5. Add account
    6. Click on iCloud and sign back in

    Send Contacts To Mac Without iCloud

    You can also transfer the contact to your Mac without the use of iCloud. The only disadvantage here is that you will have to sync the contacts manually each time you update them on your phone

    Through USB Cable

    Before you do this, make sure that the iCloud contact sync has been turned off before you proceed. 

    1. Connect the iPhone to the Mac by using the USB cable
    2. Open the iTunes app on the Mac
    3. Select the iPhone icon that can be found in the top left corner
    4. Select ‘info’ on the sidebar
    5. Now check the ‘sync contacts’ box
    6. And then click on apply

    Syncing Contacts to Mac Via Airdrop

    This is another method that can be used to sync contacts between your iPhone and the Mac device. This is one of the fastest solutions you can get to use in syncing your contacts from your iPhone to your Mac device.

    1. Go to the contacts app
    2. Locate the contact you want to transfer
    3. Tap on ‘share contact’ to airdrop
    4. Choose mac
    5. Now select ‘accept’ on your mac

    Frequently Asked Questions

    Is there another way to sync contacts?

    As of now, these are the only recommended ways through which you can sync contacts with your Mac

    Will I need to update every time?

    Since the iTunes method is a manual one, you will have to update each time you save a new contact. You can do that by using the airdrop methods 

    Conclusion

    The methods for syncing contacts from your iPhone to your Mac device are straightforward and uncomplicated. The simplicity of these approaches aligns with their apparent ease of implementation.

    You might also want to check out how to save data on your phone and also how to restore backup from your MTN.