Category: Tutorials

  • Here Is How You Can Disable / Remove ‘Reading List’ From Your Google Chrome

    Here Is How You Can Disable / Remove ‘Reading List’ From Your Google Chrome

    If you find that the reading list button in Google Chrome is not something you wish to use and you’d prefer to have a clean bookmarks bar, you can easily remove it from your browser.

    This allows you to customize your Chrome interface to better suit your preferences.

    What Is The Google Chrome Reading List Button?

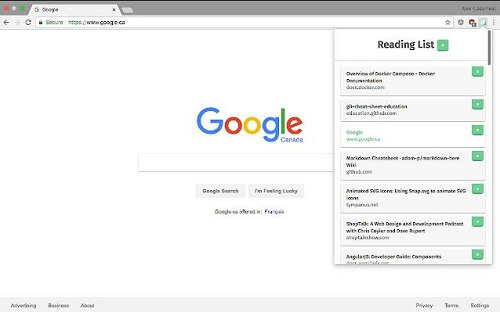
    The Reading List button in the Google Chrome browser serves as a valuable feature, offering users a convenient way to save interesting articles for later reading.

    Once a webpage is added to the Reading List, it becomes easily accessible at any time by opening the Google Chrome browser and clicking on the Reading List icon.

    This functionality enhances the user experience by providing a seamless and organized way to manage and revisit saved articles.

    How To Disable Reading List In Google Chrome

    If you no longer find the Reading List button useful and wish to remove it from your Google Chrome browser, you can follow the steps below:

    1. Open Google Chrome on your computer.
    2. Look for the Reading List button, typically located at the top right corner of the screen.
    3. Right-click on the Reading List button.
    4. From the context menu that appears, select “Hide reading list” or a similar option.

    By following these steps, you can easily remove the Reading List button from your Google Chrome browser, providing you with a cleaner and more personalized browsing experience.

    Google Chrome Settings

    If you are using the latest version of the Google Chrome app and wish to disable the Reading List, you can follow these steps:

    1. Open Google Chrome on your computer.

    2. Click on the three-dot menu located at the top right corner of the screen.

    3. From the menu, select “Settings.”

    4. Scroll down to the “Appearance” section.

    5. Toggle the switch next to “Show bookmarks” to the “Off” position.

    By completing these steps, you have successfully disabled the Reading List through Google Chrome settings, providing you with the option to tailor your browsing experience according to your preferences.

    Google Flags

    You can also disable the Reading List through Google Flags. That is when you see that the Reading List cannot be disabled in the Google Chrome settings. Follow the simple steps below.

    1. Open Google Chrome and then type ‘chrome://flags/#reading-list’ in the URL bar and then press on entering.
    2. You will search for the Reading List on the drop-down menu
    3. After you locate it, change its status from default to disabled.
    4. Click on the relaunch button, which will appear at the top, to save the new changes. 

    Conclusion

    You will not see the Reading List anymore after the browser has restarted. This article covers an easy way to disable the Reading List on your Google Chrome browser. You can also check out things to look out for when choosing a good web browser and between Chrome and laptop the best one.

  • How To Upload Your Files To Google Drive

    How To Upload Your Files To Google Drive

    Uploading files to Google Drive is a straightforward process. Once uploaded, these files become accessible across various electronic devices, including Android, iOS, Mac, or PC.

    The convenience of accessing files is not contingent on location; rather, it relies on the availability of reliable internet services.

    What Is Google Drive?

    Google Drive is a cloud-based storage service developed by Google Inc., offering users 15GB of complimentary storage upon the creation of a Gmail account.

    If additional storage beyond the initial 15GB is required, users have the option to purchase more space from Google.

    This versatile platform allows users to upload various file types, including photos, videos, text files, PDFs, and documents from the Microsoft Office suite.

    The uploaded files can be accessed on different devices, regardless of the user’s location, as long as there is an internet connection.

    Furthermore, Google Drive serves as a convenient solution for attaching large files to email messages. Instead of directly sending sizable attachments, users can upload files to Google Drive and share them as links in email messages.

    Recipients can then easily download the files from Google Drive upon receiving the email.

    How To Upload The Files To Google Drive

    Now that we know what Google Drive is and what it is used for, let us look at how you can upload your files to Google Drive easily. Please just follow the steps shown below.

    1. Go to Google Drive on your computer and click on ‘go to drive’
    2. Type in your email address and log into your Google account
    3. Now, click on ‘+New’ after you have logged in
    4. Now, choose ‘file upload’ in the drop-down menu that will appear
    5. On the following screen, go to the file that you wish to upload and select and then click on ‘open’
    6. The file you selected will then be uploaded to Google Drive. You will then see it on Google Drive

    You should take note that when the file is large, it will take some time before it gets uploaded to the drive so you will not see it there immediately. You will need to wait a while.

    Uploading Multiple Files To Google Drive

    If you want to upload a bunch of files together, you can do so instead of uploading each of them one by one.

    Google Drive allows you to upload a folder with multiple files inside it. Please follow the steps below to upload a folder of files to Google Drive.

    1. On your computer, go to Google Drive and sign in to your Google account
    2. Now, click on ‘+New’ and then choose ‘folder upload’ inside the drop-down menu
    3. Now, go to ‘upload’ and choose the folder you wish to upload, and then click on ‘open’
    4. The folder that you chose will be uploaded to Google Drive. You will then be able to see it in Google Drive after it has finished uploading 

    Editing Files On Google Drive

    Although Google Drive is a cloud-based storage service, it allows you to do more than just store files for safekeeping.

    You can even use Google Drive as a workspace where you will be able to edit your files such as Microsoft Word and excel work files.

    All these can be done on Google Drive. Please follow the short steps below on how to do that. 

    1. In your Google Drive, right-click on the file that you want to edit
    2. Choose ‘open with’ and then select ‘Google Sheets’ from the menu that appears. You can also use Google Docs for this purpose if the file is a Microsoft Word file
    3. The file you chose will be opened in either Google Sheets or Google Docs depending on the type of file that it is. You will now be able to edit the files and then save it

    Conclusion

    With the information provided, you now know to effortlessly upload your files to Google Drive for secure storage.

    Additionally, you are equipped with the skills to edit files that have been previously uploaded to Google Drive.

    I trust that you found this article informative, and I encourage you to visit this site for more educational content.

  • How You Can Show The CPU Frequency In Your Android Status Bar

    How You Can Show The CPU Frequency In Your Android Status Bar

    In the realm of mobile operating systems, Android and iOS stand as the foremost contenders, with Android holding the predominant position globally.

    This prevalence is attributed to its widespread availability across a myriad of smartphones and devices, including tablets.

    In contrast, iOS exclusively graces Apple devices, limiting its reach in comparison to the ubiquity of Android. Notably, Android distinguishes itself by affording users a broader spectrum of customization options when juxtaposed with the more constrained iOS environment.

    With the advent of the latest iteration of the Android mobile operating system, users now can exhibit their internet speed directly on the status bar.

    This feature may already be familiar to some Android users, as it adds a layer of real-time connectivity information alongside the default display of network connections, battery percentage, and Wi-Fi signals.

    For those enthusiasts desiring to delve deeper into the performance metrics of their devices, particularly the real-time frequency of the CPU, there exists a pathway to manifest this information on the status bar.

    The process entails the installation of certain third-party applications, and this article endeavors to elucidate and guide users through both methods. Let us proceed to explore these two approaches.

    CPU Float 

    This is an Android app that can be used to show the frequency of your CPU on your status bar. It is one of the best apps there is for what it does.

    The app is a floating app that observes several system information on your device. Please follow the steps below on how to use the app on your Android smartphone.

    1. Go to the Google Play Store and download the app
    2. After it has been installed, grant it all the permission it needs
    3. Now, go to the main interface of the app and tap on ‘Preferences’
    4. Enable the ‘status bar’ option
    5. Now, under the monitor section, you will enable both ‘CPU’ and ‘CPU temperature’

    After all that has been completed, press your home button, or anyhow you get your device back to the home page and you will see that CPU frequency has appeared on the status bar. That is how the CPU Float app is used,

    Now, in case you have rooted your Android device and find that you cannot use CPU Float on your device, there is another Android app that can get you the same results on a rooted device.

    TinyCore

    Introducing a commendable third-party application for monitoring the performance metrics of your Android smartphone or device, a tool that stands out for its compatibility with both rooted and non-rooted Android devices.

    This app distinguishes itself as one of the premier choices for Android users due to its versatility. Regardless of whether your Android device is rooted or not, this application provides a comprehensive suite of features.

    Notably, it empowers users to display crucial information directly on the status bar, enhancing the user experience.

    Among its notable capabilities, this application allows users to showcase CPU usage in percentage, monitor RAM usage, and conveniently display the battery level—all on the status bar of your Android device.

    This multifaceted functionality ensures that users can stay informed about the key performance indicators of their devices effortlessly.

    For those seeking a reliable and flexible solution to monitor and display critical system information, this application proves to be a noteworthy choice.

    Whether you are an advanced user with a rooted device or prefer to keep your Android device non-rooted, this app caters to a broad spectrum of users, enhancing the accessibility of performance monitoring on Android devices.

    Conclusion

    This article has provided a comprehensive guide on incorporating the display of CPU frequency on your Android device’s status bar using third-party applications.

    These versatile apps offer a straightforward solution, ensuring ease of implementation for users with varying preferences and device configurations.

  • How To Use Your Android Device As A Second Monitor To Your Computer

    How To Use Your Android Device As A Second Monitor To Your Computer

    There are some times when you may need to have a dual-screen setup to make the work you are doing more efficient.

    So it can be stressful when you realize that you have only one monitor at a time and no one near you has a monitor to spare.

    In such times, there is no need to fret after you read this article because you would be able to know how to get a second screen for your computer without even having to look for a monitor from elsewhere.

    If you have an android device, then you do not need to worry since that is all you will need in other to get a second screen for your computer.

    I am going to show you how you can use the android device as a second monitor in this article.

    Android is a very versatile mobile operating system but a lot of users seem to be ignorant of its features and capabilities.

    Features such as mirroring your android device to another android device and turning your Android device into a second monitor for your computer are just a few of what android can do.

    When you turn your android device into a second monitor for your computer, you will be able to view the entire screen on your android. Let us now look at how to make this happen.

    Turning Your Android Device Into A Second Monitor

    We are going to look at how you can turn your android device into a second monitor for your computer to aid with whatever work that you are doing. 

    Spacedesk

    Spacedesk is a very great third-party app designed for both android and windows operating systems.

    This app allows you to turn your android device into a second monitor for your computer quickly. Let us look at how Spacedesk works.

    1. You will first have to download the Spacedesk client app for your windows computer. Install it on your computer after downloading
    2. After installing it on your computer, download the mobile version for your android. The app can be found on the google play store
    3. Connect your android device to the computer and make sure that they are both connected to the same wifi network
    4. Open the Speacedesk app on your phone. You will see your computer there, tap on ‘connect’

    The android device will then be connected to your computer and you will be able to see the whole screen of your computer on the android device.

    TeamViewer

    This is another popular tool that can be used to achieve the same result as we did with the Spacedesk app.

    TeamViewer is available on several operating systems such as android, IOS, mac, and windows. One of the best features about TeamViewer is the remote control abilities it comes with.

    Just like Spacedesk, you will first have to install the TeamViewer for Remote Control on your android device and install the TeamViewer client on your computer. Kindly follow the steps below.

    1. Download TeamViewer for Remote Control on your android device
    2. Download TeamViewer and install it on for your computer
    3. Pen the TeamViewer app on your computer and you will see an ID and a password
    4. Go to the mobile app on your android device and tap on ‘remote control’
    5. You will then need to enter the password you saw on the computer. Do that and tap on ‘ok’
    6. After the connection has been established, you will see that the computer screen has now been displayed on your android device and you would now be able to use it as a second monitor for your computer

    And you are done with it. As you can see, it is very simple. All you need is to download either Spacedesk or TeamViewer, whichever you prefer, and then proceed to follow the steps that have been listed for the app which you chose.

    You should also note that apart from these two apps, several others can be used for the same purpose.

    The Splashtop Wired XDisplay is an app that needs a USB cable to work and is a responsive and real-time app for turning your android device into a second monitor.

    Google remote control is also another app that gives users the ability to control their computers from their android smartphones. However, you can use a separate app on both computer and android. Apart from that, it is an easy app to use.

    Conclusion

    So that was how you can turn your android into a second monitor to supplement your computer monitor. I hope that this article has been really helpful to you.

    Please make sure to visit this site whenever you require tech articles.

  • How To Remove Apps That Were Pre-installed On Your Windows 10

    How To Remove Apps That Were Pre-installed On Your Windows 10

    The Windows 10 operating system, initially provided by Microsoft at no cost, does come with certain features and applications that users may find unnecessary.

    While users can access all the features without charge, there is a trade-off when viewing advertisements.

    Notably, these ads appear on the Start menu, suggesting various apps, such as OneDrive, Office, Skype, and others.

    For users transitioning from Windows 7 or 8 to Windows 10, the presence of pre-installed apps, some of which may be deemed unnecessary, can be a concern.

    Apart from the ads, these apps occupy storage space on the device, prompting users to seek a means of removal to free up valuable storage for more essential applications.

    Recognizing the importance of optimizing device storage, this article provides a guide on removing pre-installed apps from your Windows 10 machine.

    By following the steps outlined, users can efficiently reclaim storage space, ensuring that their device is tailored to their specific needs.

    If you are a Windows 10 user seeking to declutter your system and create room for more pertinent applications, this article is tailored to assist you in the removal of unnecessary pre-installed apps, facilitating a more personalized and streamlined computing experience.

    How To Remove Pre-installed Windows 10 Apps

    Now, to remove the pre-installed apps, there are ways that you will have to follow. Let us take a look at them. All you have to do is follow the simple that have been listed below to get rid of the unwanted pre-installed apps on your machine.

    1. Open the Settings app on your Windows 10 system
    2. Now press Windows key + I. This will open the settings app
    3. Now click on ‘apps’  
    4. Now click on ‘apps and features’ this can be located on the left pane 
    5. Scroll down and choose the app you are looking to install and then click on uninstall.

    After completing the process above, you will see that the particular app has been removed from the computer. You can do this for all the apps that you are looking to remove from your computer. 

    How To Disable Apps Suggestion Feature

    In case you do not want to remove the apps but do not want to be notified of them by anything, you can get that done in the settings as well. Doing this can be done in the settings as well. Please follow the steps below.

    1. Go to settings again
    2. Go to ‘personalization’ and then head over to ‘start’
    3. Now locate ‘occasionally show suggestions in the start’. Disable it.

    This will cause the ads that tell you to open an app in the start menu to cease from then on.   

    How To Disable Microsoft Consumer Experience

    You can also disable the Microsoft consumer experience. The apps and suggestions are all part of the Microsoft consumer experience.

    This can be disabled as well if you wish to do so. Doing so will stop the apps and suggestions from playing again.

    However, this can only be done if you are using the enterprise edition of the Windows 10 operating system.

    So in case, you are running the enterprise edition of Windows, please just follow the short steps below to disable the Microsoft consumer experience. 

    1. Open RUN dialog box and type in ‘gpedit.msc’
    2. Now head over to ‘computer configuration’
    3. And then to ‘administrative templates’
    4. Now go to ‘windows components’ and then to ‘cloud content’
    5. Enable ‘turn off Microsoft consumer experiences

    And you are done. it will now be turned off. The app suggestions will then stop. Automatic installations of apps will also cease.

    Conclusion

    So I hope this article has been helpful today. You just learned how to remove pre-installed apps in Windows 10. Make sure to visit the site to get to know how to do more things on your Windows 10 system.

  • How To Find Groups On Telegram

    How To Find Groups On Telegram

    This article serves as a comprehensive guide to help you discover and join Telegram groups, leveraging the platform’s openness for group exploration.

    Unlike WhatsApp, where group discovery is more restricted, Telegram allows users to actively search for and join various groups of interest.

    Perhaps you’ve heard from friends about engaging and active Telegram groups, sparking your curiosity to join the conversations and share media.

    If you’ve found yourself in the position of being new to the app or unsure of how to locate these groups, worry not – this article is designed to walk you through the process, ensuring you can easily find and become part of the Telegram communities that intrigue you.

    Before delving into the step-by-step guide, it’s helpful to understand the three main types of groups on Telegram, each offering distinct features and purposes.

    This brief overview will provide you with insights into the diversity of groups available, setting the stage for a smoother exploration process. Let’s explore these group types before proceeding with the instructions.

    Types Of Telegram Groups

    Private Group

    One of the primary group types on Telegram is the “Chat Multi-User Group” with a maximum membership limit of 100,000 individuals.

    This particular group operates with a level of exclusivity, as it cannot be discovered or joined by a user without a direct invitation from an administrator.

    The administrator facilitates entry by sharing a unique link with the intended user. This design ensures that membership remains controlled, and only those invited can participate in the group’s conversations and activities.

    If you find yourself seeking to join such exclusive groups, keep in mind that the key to access lies in receiving an invitation link from the group’s administrator.

    Private Supergroup

    Another notable type of group on Telegram is the “Chat Multi-User Group,” similar to the one described earlier, with a membership cap of 100,000 individuals.

    However, this variant stands out from private groups in its enhanced functionality. Moderators in this group possess additional privileges, such as the ability to delete and pin messages, granting them more control over the group’s content and dynamics.

    This type of group is classified as a “Supergroup,” introducing a layer of exclusivity. Just like the previously mentioned group, users cannot readily identify it within the app unless they receive a direct invitation from an administrator or join through a unique link.

    This added layer of access control ensures that membership is curated, maintaining a balance between a sizable community and a degree of exclusivity.

    If you are looking to be part of a supergroup, reaching out to an administrator for an invitation link is the key to entry.

    Public Supergroup

    The third type of group on Telegram is the “Public Group,” distinguished by its accessibility and visibility within the Telegram app.

    Unlike private groups that maintain a level of exclusivity, public groups can be readily identified by users directly within the app.

    Additionally, these groups can be discovered through various social media platforms, expanding their reach beyond the Telegram ecosystem.

    The key characteristic of public groups is their openness to exploration. Users can search for and join these groups without requiring a direct invitation from an administrator or a unique link.

    If you are actively searching for how to find groups on Telegram, targeting public groups is the most straightforward approach.

    Their visibility and ease of discovery make them a primary choice for users looking to engage in a wide range of discussions and activities within the Telegram community.

    How To Find Telegram Groups

    Let us look at how you can search for a group on Telegram.

    1. First of all, you will have to open the telegram app.
    2. After the home screen has appeared, you can use the search engine to search by typing in the name of your group.
    3. The search engine can be seen on the top left corner of the screen. After you see the group you are looking for, you just tap on it and join clicking on ‘join group

    Searching For Telegram Groups On Websites

    Exploring and discovering Telegram groups can be facilitated through various online platforms, with Telegram Spain being a noteworthy option.

    This platform caters to channels, groups, and bots, offering a comprehensive search experience.

    To initiate your search on Telegram Spain, begin by navigating to the website using an internet browser. On the main screen, locate and click on the “Groups” menu item, unveiling a dedicated section for groups. Utilize the search engine to pinpoint the specific group you seek.

    Upon touching the word “Groups,” you’ll have visibility into different categories of groups. Identify your desired group and proceed by clicking on the “Add to Telegram” button for inclusion.

    For a more curated experience, consider filtering the groups by selecting the “Top 100” option, showcasing the most trending groups, and potentially featuring the one you’re looking for.

    To streamline your search further, you can leverage dedicated websites such as the Telegram guide website.

    This resource serves as a reliable hub for discovering a multitude of Telegram groups, simplifying the process of finding the communities you’ve been seeking.

    How To Search For Groups On Telegram Through Channels

    An alternative method for discovering Telegram groups involves utilizing channels within the platform. By subscribing to a channel, you gain access to posts related to groups, as channels often serve as sponsors for various groups.

    Consider joining the Telegram Spain channel as an example. Once you become a member, you’ll have the ability to view posts categorized under the “Groups” section.

    Simply click on the link provided by the group administrator, which redirects you to the Telegram Spain website.

    Follow the previously outlined steps by clicking on ‘add to Telegram,’ which seamlessly opens Telegram. Subsequently, you can subscribe to the desired group, enhancing your accessibility and engagement within the Telegram community.

    This approach offers an additional avenue for efficiently discovering and connecting with the groups that align with your interests.

    Conclusion

    This article comprehensively explores various methods for finding and joining Telegram groups. The strategies discussed range from using dedicated websites for Telegram group searches to joining groups through provided links, among other approaches.

    By delving into these techniques, we have provided a thorough guide that aims to equip readers with all the necessary information to seamlessly navigate the process of joining Telegram groups.

    While it might appear intricate initially, I am confident that with practical application, this endeavor will become a straightforward and easily manageable task.

    Should you encounter any challenges or uncertainties, feel free to revisit this guide for a quick and reliable reference.

    Mastering the art of joining Telegram groups opens up a world of connectivity and shared interests, enriching your experience within the Telegram platform.

    And when you find a group to be annoying, you can click here to know how to leave the Telegram group the right way.

    Don’t forget you can get to know if someone has saved your number or not using Telegram, click here to learn that new trick.
  • How To Recover Unallocated Space On A USB Drive

    How To Recover Unallocated Space On A USB Drive

    In instances where the hard drive partitions are not visible in the Windows 10 File Explorer after a clean installation, the issue may stem from formatting with an incorrect file system.

    Checking the disk partitions in the Disk Management utility often reveals unallocated space.

    Recovering this unallocated space is still possible, even if you neglected to create a partition during the Windows 10 installation. The process is straightforward.

    Similar problems can arise with USB drives, where the created partitions are not visible. Fortunately, USB drives support partitioning just like hard drives, and resolving this visibility issue is achievable by following the steps outlined in this article.

    This article provides three methods to address the problem effectively. Let’s explore these methods to ensure proper visibility and utilization of disk partitions on both hard drives and USB drives.

    Using Disk Management Utility

    In this method, you will use the disk management utility to solve the problem by recovering the unallocated space on the USB drive. Follow the steps below.

    1. Open the Windows RUN dialog box. You can do this by pressing on windows key + R
    2. In the RUN dialog box, enter ‘diskmgmt.msc’
    3. When the disk management utility opens, right-click on the unallocated space behind the USB drive and choose ‘new simple volume’ 
    4. Click on ‘next’ when the ‘new simple volume’ wizard opens
    5. Specify the volume size that you want and then click on ‘next’
    6. Assign a drive letter and then click on ‘next’
    7. Format the newly created volume by choosing ‘NTFS’ as the file system enable the option ‘perform quick format’ and click on ‘next’

    And you are done. The unallocated space on the USB drive will be recovered for you. Let us look at the next method.

    Using AOMEI Partition Assistant 

    There is a lot of third-party software out there you can use if you do not feel like using the method that has been shown above. One of the best among them is the AOMEI Partition Assistant Standard Edition.

    This tool is free and can be used on the Windows operating systems. Follow the steps below to use the AOMEI partition assistant.

    1. Download the AOMEI tool and install it on your computer. After installation, open it
    2. You will see the main interface of the tool. Right-click on your USB partition and the choose ‘format partition’ a pop-out window will appear where you will be required to choose either ‘NTFS’ or ‘FAT32’ choose one and click on ’ok’
    3. Right-click on the existing partition and choose ‘resize partition’ in the next window that appears, drag the slider to the end of the disk
    4. Now, you will be able to see the partition status and you will also be able to undo what you did as well if you want to. If you are ok with everything so far, then you just click on ’apply to effect the changes you just made

    And you are done. This is how you can use the AOMEI tool to recover your unallocated disk space. Now let us look at the final method.

    EaseUS Partition Master

    This is another free third-party tool that can be used to solve the problem of unallocated space. It is one of the best third-party apps out and has received lots of acclaim.

    It can be used on both a USB drive and an SD card. Now, let s look at how you can use this tool to fix the problem on a USB drive.

    1. Download and install the EaseUS tool on your computer. Now connect your USB device to the computer and open the EaseUS appRight-clickk on your USB partition to erase the data
    2. Input the tie you want the partition to be wiped and then click on ‘ok’
    3. The pending operation will be shown to you. Just click on ‘execute operation’ to carry on. 
    4. Right-click on the unallocated space on your USB and choose ‘create’ to make a partition
    5. Now, enter the size of the partition label, the letter, and the file system, and then click on ‘ok’
    6. Now click on ‘execute operation’ and then click on ‘apply’

    And you are done. The operation will be executed and the unallocated space recovered.

    Conclusion

    Recovering unallocated space on your USB drive is a straightforward process. The methods outlined above offer user-friendly steps, making it easy for you to choose the one that suits your preferences.

    Simply follow the selected method, and you’ll be able to recover and utilize the unallocated space on your USB drive effortlessly. If you encounter any challenges or have further questions, feel free to seek assistance.

  • How To Reset Your Windows 11 Computer Back To Factory Settings

    How To Reset Your Windows 11 Computer Back To Factory Settings

    Since the release of Windows 11, it has garnered considerable attention within the tech community. This new operating system introduces a host of impressive features and visual changes, accessible to users participating in the Windows Insider program.

    If you find yourself part of the Windows Insider program, chances are you’ve already integrated Windows 11 into your computing environment.

    However, being an early adopter may expose you to certain issues, bugs, or glitches inherent in the OS.

    If you encounter such challenges, a viable solution may involve resetting the operating system to its factory settings.

    This process can effectively address problems and minimize the occurrence of bugs. In this article, I will guide you through the steps to reset your Windows 11 operating system to its default settings. Rest assured, our tutorials are crafted for simplicity and ease of understanding.

    Follow the outlined steps below, and you’ll be able to seamlessly reset your Windows 11 operating system.

    How To Set Windows 11 Back To Default Settings

    Before resetting the OS back to default settings, there are some things that you will need to do first. These are listed below. Just follow the steps.

    1. Click on the Windows start button and go to settings
    2. After opening the settings page, locate and click on the ‘Windows update’ option
    3. Now, look at the right pane and click on ‘advanced options
    4. Scroll down until you reach the ‘recovery’ option and click on it
    5. Now, click on ‘reset PC’
    6. You will have to choose to either keep your files or have everything cleaned from the computer. Choose the option that prefers
    7. You will then have to choose how windows will be re-installed after the resetting. Choosing cloud download will cause a fresh copy to be downloaded while choosing ‘local reinstall’ will have the computer reset locally. I recommend choosing the first option
    8. Now, click on ‘reset’ and you are done

    Conclusion

    The reset process will commence, and its duration will vary based on the selected options, typically ranging from 30 to 60 minutes.

    Upon completion, your computer will have been restored to its factory settings, providing you with a fresh start.

    If you found this article beneficial, consider revisiting our site for additional tech articles. Your feedback is invaluable, so please take a moment to comment and express your appreciation.

    Don’t forget to like and share, allowing us to gauge the helpfulness of our articles for both you and your friends. Thank you for choosing our platform for your tech insights.

  • How To Add Text To PDF Files With Microsoft Edge Browser

    How To Add Text To PDF Files With Microsoft Edge Browser

    Google Chrome is undeniably one of the most popular browsers available for various platforms, including Windows, Linux, Mac, Android, and iOS.

    Despite its widespread use, some features found in its competitors, such as the Microsoft Edge browser, are notably absent.

    Microsoft Edge, being Microsoft’s latest browser, introduces features not present in Google Chrome. One such feature is the built-in PDF reader, allowing users to not only view PDF files but also make modifications directly within the browser.

    In today’s article, I’ll guide you through the process of using the Microsoft Edge browser to add text to a PDF file.

    The advantage here is that you won’t need to download any third-party apps to modify PDF files if you have the Microsoft Edge browser on your machine.

    In the past, users often relied on third-party applications for tasks like signing PDF files. With the Microsoft Edge browser, this is no longer necessary.

    Whether you need to sign contract PDF files or make other modifications, the steps provided in this article will make the process straightforward.

    Follow along, and you’ll be able to utilize the built-in PDF editing capabilities of the Microsoft Edge browser without the need for additional third-party apps.

    How To Add Text To Pdf File On Microsoft Edge

    Just follow the steps shown here carefully and you would be able to add text to any pdf file on Microsoft edge. 

    1. Locate the pdf file that you want to modify and right-click on it
    2. Choose ‘open with’ and select the Microsoft Edge browser or you can simply drag the pdf file and drop it in the browser
    3. Now, on the edge editor, locate and click on ‘add text’
    4. There will be a floating textbox with three options which are text color, text spacing, and text size
    5. Click on the part where you want to add your text and start typing
    6. Click on the ‘text color’ option to change the color of your text
    7. Use the ‘text size’ option to adjust the size of the text
    8. There is also the ability to for text spacing by using the ‘text spacing’ option
    9. After you are done with the editing, just click on ‘save’. This can be located on the top right corner of the. The pdf file will then be saved with the new modification you just made.

    And that is how you modify a pdf file with the new Microsoft Edge browser. This is a feature that cannot be found in the Google Chrome browser.

    So if you are someone who deals with PDF files a lot, then maybe your browser of choice should be the new Microsoft Edge browser.   

    Conclusion

    So this article was about using the new Microsoft Edge browser to open and make modifications to PDF files. Note that this feature is available on the Microsoft Edge Dev and Canary builds.

    I hope this article has been helpful to you today. Please prove it by visiting the site for tech articles and make sure to leave some comments so that I can know the kind of tech knowledge you are seeking.

  • Here Is How You Can Follow Websites On Google Chrome On Android

    Here Is How You Can Follow Websites On Google Chrome On Android

    Recently, Google introduced a new feature on the Chrome browser known as ‘web feed.’ Initially, this feature was exclusively available to selected users in the USA.

    However, I am pleased to inform you that it has now been made accessible to all users of the Chrome browser, expanding its availability beyond the borders of the USA.

    The ‘web feed’ feature is designed to enhance the browsing experience, providing users with curated content and updates directly within the Chrome browser.

    This expansion ensures that users worldwide can now take advantage of this feature, bringing a more enriched and personalized browsing experience to a global audience.

    Stay tuned for more updates and improvements as Google continues to enhance its browser capabilities.

    What Is The Web Feed?

    Google’s latest addition, the ‘Web Feed’ feature, empowers users to subscribe to their favorite websites, ensuring a seamless flow of curated content directly to their Chrome browser.

    This functionality includes a convenient ‘Follow’ button, making it easier for users to stay connected with the content they love.

    Excitingly, this feature is now available on the latest Chrome version for Android users. By subscribing to a website, users can conveniently access its content directly from Chrome’s tab page, providing a centralized hub for their preferred sources.

    While it’s worth noting that the feature is currently undergoing testing, adventurous users can still explore and experience it firsthand.

    In today’s article, we’ll guide you through the steps to activate this cutting-edge Chrome feature on your Android mobile, allowing you to make the most of the enhanced browsing experience.

    Stay tuned for a more personalized and engaging interaction with your favorite websites on Chrome.

    How To Enable The ‘Web Feed’ Feature

    You can enable the web feed feature by following the steps below.

    1. Before we get started, you have to make sure that you have the newest version of Google installed on your mobile. If you do not have it, then head straight to the Play Store app and download the newest version of Google Chrome.  
    2. After installing the new version, open it in the URL bar ‘chrome://flags’
    3. Now type in ‘wen feed’ on the Chrome experiments page and press the enter button
    4. Look for the web page flag and choose ‘enabled’ from the menu that drops down
    5. After that, click on the ‘relaunch’ button so that the browser can restart
    6. Now visit the website you would like to follow and tap on the three dots located in the upper right corner of the screen
    7. Scroll down to the bottom of the menu and tap on ‘follow’
    8. Now go to the Google Chrome tab and choose the ‘following’ tab. You will see a list of articles on the websites that you are following

    Conclusion

    Congratulations! You’ve successfully activated the Web Feed feature on your Android device, unlocking the convenience of effortlessly following your favorite websites.

    Now, you can enjoy a streamlined experience, receiving updates and accessing articles directly from the Chrome browser without the need to visit each site individually.

    This enhancement to your browsing routine allows for a more efficient and enjoyable way to stay informed.

    Dive into the content you love with ease, and let the Web Feed feature transform how you engage with your preferred websites. Happy browsing!

    You can also check our other google chrome guides such as how to enable the dark mode theme on google chrome and how to remove the reading list from your google chrome.

    After you are done following this tutorial and the web feed feature is working, make sure to follow this website that is the least you can do for us, right?