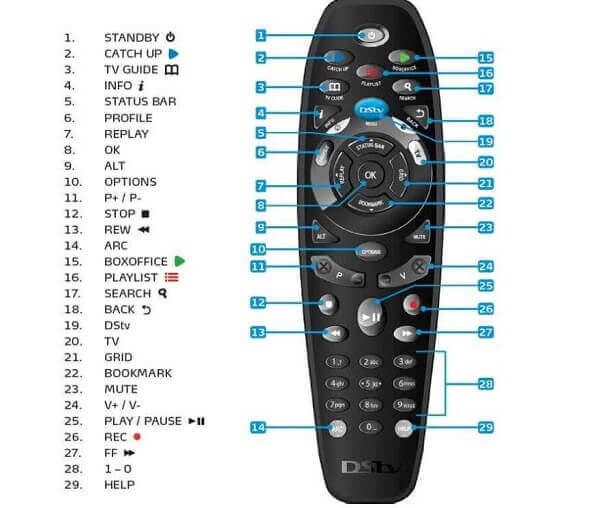
Category: Tutorials

  • Fixing A DSTV Remote That Has Stopped Working

    Fixing A DSTV Remote That Has Stopped Working

    DSTV, a direct-to-home broadcast satellite service, stands as a premier entertainment platform, boasting over 200 television, radio, and audio stations.

    Recognized as one of the top services on the African continent, DSTV attracts a wide audience seeking unparalleled TV entertainment.

    A significant draw for football enthusiasts lies in the ability to witness live matches without the need for additional payments at external venues.

    Beyond sports, DSTV offers a diverse array of channels, showcasing top-tier movies, documentaries, live programs, and various other engaging content.

    Now, let’s consider a scenario familiar to many: the DSTV decoder’s remote control ceases to function.

    In this article, we will explore the steps to revive a non-functional remote control, ensuring uninterrupted access to the myriad offerings DSTV brings to your home.

    Troubleshooting

    An initial and crucial step in resolving a non-functional remote control is to initiate a troubleshooting diagnosis.

    The specifics of this diagnosis will be contingent upon the model of the controller in use. Through troubleshooting, you can ascertain whether the controller is indeed malfunctioning or if there is a simpler underlying issue.

    For instance, a seemingly malfunctioning remote control may have a simple resolution such as a depleted battery.

    Conducting this diagnostic process systematically can often unveil the root cause of the issue and guide you toward an effective solution.

    How To Know If The Remote Is Broken

    An indication that the remote controller might be malfunctioning is the failure of the ‘link eye’ to respond.

    When pressing any button on the remote yields no response in the form of a flashing green light, it suggests a potential issue with either the batteries or the remote itself.

    Initially, replacing the batteries is a practical step. If, even after battery replacement, the problem persists, it becomes likely that the remote has encountered a malfunction or breakdown.

    In such cases, where the device is still under warranty, DSTV provides the convenience of free repairs, ensuring a swift resolution to the issue at hand.

    How To Solve DSTV Remote Problems

    Now let us look at some ways through which you can solve the problem on your own. It can be that you do not have a warranty anymore because it has been more than a year since you purchased the decoder. 

    Check Batteries

    As mentioned earlier, a critical initial step in troubleshooting a non-functional DSTV remote is to assess the condition of the batteries.

    If the remote exhibits issues during channel changes or adjustments to volume, a low battery might be the culprit.

    In such cases, replacing the batteries becomes imperative to restore normal functionality.

    Additionally, it’s worth noting that improper insertion of batteries can contribute to operational issues.

    If you suspect this to be the case, carefully remove and reinsert the batteries, ensuring a secure and proper connection.

    By addressing these battery-related concerns, you enhance the likelihood of resolving remote control issues associated with channel changes and volume adjustments.

    Checking For Electronic Glitch

    An electronic glitch can happen on the signal of the DSTV remote before the signal reaches the decoder. Here is how to correct such glitches.

    1. Take out the batteries from the remote
    2. Press the menu button for about 30secs and hold it without the batteries in the remote 
    3. Release the menu button and then insert the batteries again
    4. This should fix the electronic glitch problem. This method clears the glitch by discharging it.

    Checking The Sensor


    In cases where the previous methods prove ineffective, it’s advisable to inspect the remote control’s sensor as a potential source of the problem.

    Here’s a step-by-step guide to checking the sensor using your smartphone’s camera:

    1. Access Camera App: Open the camera application on your smartphone.
    2. Activate Remote: Press any button on the DSTV remote control while pointing it towards the camera lens on your smartphone.
    3. Observe Infrared Light: Look at the smartphone screen through the camera. If the remote is functioning correctly, you should see a blinking or steady light on the remote control’s sensor through the smartphone camera.

    This test helps determine whether the remote is emitting infrared light signals when buttons are pressed.

    If there is no visible light on the camera screen, it may indicate a malfunction in the remote’s sensor.

    In such cases, professional assistance or replacement of the remote control may be necessary.

    Cleaning Transmission Window

    To ensure seamless communication between the remote and the decoder, it is crucial to maintain an unobstructed transmission window.

    This is because the remote and the decoder rely on the transmission of an infrared signal for effective communication.

    To troubleshoot any potential issues, it is recommended to clean the upper edge of the remote control.

    By doing so, you can eliminate any potential obstacles that may hinder the transmission of the infrared signal.

    Once the cleaning process is complete, attempt to use the remote control again. This simple step can often resolve communication issues and enhance the overall performance of the remote-decoder interaction.

    Checking Signal Interference

    When you are using the remote, you should make sure that there is no object between you and the TV.

    An object that is between you and the TV could block the signal from getting to the decoder.

    Some electronic equipment such as phones and radios could even disrupt the signal coming from the remote. Make sure none of these is between you and the TV.

    Reset The Remote

    If all else fails, it will now be time to reset the remote. Most of the time, this is what fixes the problem.

    Resetting the remote may be what you need to do before it will begin to work again. Here are the steps to reset the remote.

    1. Press and hold the ARC button and the power button together for 5 seconds
    2. The remote color will change to a yellow-brown color
    3. Now release the power button while your finger stays on the ARC button
    4. Dial 9499 and you will see that the green light is now flashing
    5. Now release the ARC button and you are good to go. This should reset the remote and fix the problem 

    FAQs

    What if all these do not work?

    If all the above do not work, then it is possible that your remote has broken and you will have to replace it.

    Can I use one remote for multiple TVs?

    Yes, you can. And this is one reason why remotes stop working because the signals could jam up

    Conclusion

    Through these steps above, you should be able to fix your remote and enjoy your DSTV entertainment without any hindrance.

    Since we are talking about TV remotes, you might also want to check out multi-tv prices in Ghana.
  • How To Configure Autoplay On Your Windows 11 Machine

    How To Configure Autoplay On Your Windows 11 Machine

    When connecting an external USB device to your computer, the Windows operating system automatically detects it upon connection.

    On Windows 10, you can personalize how the operating system interacts with the USB devices upon insertion.

    This functionality is referred to as ‘autoplay,’ allowing you to set default actions for various USB drives, memory cards, and other connected media.

    Similarly, the ‘autoplay’ feature is present in the Windows 11 operating system. However, in Windows 11, it is discreetly located within the settings, requiring users to navigate to access it.

    This article aims to guide you through the process of enabling and configuring the ‘autoplay’ feature on your Windows 11 machine.

    Follow the outlined steps in this article to seamlessly configure the ‘autoplay’ feature on your Windows 11 system.

    How To Configure The ‘Autoplay’ Feature In Windows 11

    The steps below will show you how to configure the ‘autoplay’ feature on windows 11. You will also see how to disable the feature if you do not want it to be working automatically. Let us get started.

    1. Click on the windows start button
    2. Go to settings. You can get here by using the shortcut ‘windows key + I’
    3. Now, click on ‘Bluetooth and devices’
    4. Click on ‘autoplay’. It can be located on the right pane
    5. If you want to turn off the ‘autoplay’ feature, just toggle under ‘use autoplay for all media and devices to off
    6. You can also configure that action of the ‘autoplay’ feature. This can be done by going to the ‘choose autoplay defaults’ section 
    7. Look under ‘removable drive’ and you will see several options like ‘configure storage settings’ ‘open folders to view files, ‘take no actions’, and ‘ask me every time. Choose the option that you prefer
    8. Under the ‘memory card’ section, there will be options like ‘import photos and videos, ‘play media files’, ‘take no action’, ‘ask me every time, ‘open folder to view files. Here too, you will have to choose the option you prefer

    So that is all done. You have just configured the autoplay feature on your Windows 11 machine.

    The options you choose will be put into effect every time you insert a USB device into the computer. You can change the options again if you like just by following the same steps as you see here.

    Conclusion

    So as you can see, the autoplay feature on Windows 11 works exactly in the same manner as the ones on the older Windows operating systems. I hope that this article has been helpful to all the Windows 11 users on here.  

  • How To Use Your Microsoft Account By Bypassing The Password

    How To Use Your Microsoft Account By Bypassing The Password

    Passwords indeed play a pivotal role in securing our digital presence, encompassing a wide array of accounts from emails to banking services.

    While they are a fundamental aspect of digital security, the inconvenience of managing and remembering passwords is a sentiment shared by many.

    The concept of a passwordless future, as advocated by Microsoft, has gained traction as an alternative security approach.

    Recently, Microsoft introduced a feature allowing users to access their Microsoft accounts without the need for a password.

    Although this feature was initially rolled out to enterprise users in March, it is now extending to a broader user base.

    This move marks a step towards a more user-friendly and secure authentication method, reducing the reliance on traditional passwords.

    Embracing passwordless alternatives aligns with the ongoing efforts to enhance digital security while addressing the challenges associated with traditional password-based systems.

    You can now make use of this amazing feature. Just follow the steps listed below.

    How To Use A Microsoft Account Without A Password

    Follow the steps below to set your Microsoft account to use without having to type in a password.

    1. Go to your play store app or Apple app store and download ‘Microsoft authenticator app’
    2. Now switch on your desktop computer and open your browser. Enter your Microsoft account and then click on ‘security’
    3. Now, click on ‘get started’ this can be found in the advanced security  
    4. Now go to the additional security option and look for ‘passwordless account’ and turn it on. This will remove the need for a password
    5. Click ‘next’ on the pop-up
    6. Now, go back to your smartphone and look at the Microsoft authenticator app you downloaded. Approve the password removal request by tapping on ‘approve’ on the app

    And that is it. You are done removing the password option from your Microsoft accounts. You will now be able to use your Microsoft account without typing in a password.

    However, be careful if you share the computer with other people so that no one can go in snooping around your business.

    The use of this feature is ideal for people who use their computers and alone and do not frequently share them.

    Conclusion

    So that is how you can get a Microsoft account without a password. The steps listed are surely quite easy to follow. There are more such educating tech articles on this site so make sure to visit for more after reading this one.   

  • How To Schedule Shutdown On Your Windows 10 Machine

    How To Schedule Shutdown On Your Windows 10 Machine

    Business owners understand the significance of adequate sleep, and for Windows 10 users, the default setting involves the system going to sleep after 15 minutes of inactivity.

    However, even in sleep mode, the computer continues to consume power. To optimize power conservation, especially for machines that aren’t frequently used, scheduling startup and shutdown times in advance is a practical solution.

    In this article, I’ll guide you through the simple process of scheduling a shutdown for your Windows 10 computer.

    This straightforward task can be completed within seconds by following the outlined steps. Once set up, you can rest assured that your computer will automatically shut down at the designated times, minimizing unnecessary power usage during periods of inactivity.

    How To Set Windows 10 Shutdown Scheduler

    Now, let us look at the steps below.

    1. Go to control panel, to administrator tools, to ‘task scheduler
    2. Click on ‘create basic task’ under the ‘task scheduler    
    3. Name it ‘shutdown’ and click on ‘next’
    4. Choose ‘trigger’ and click on ‘daily’ You will also have to input the time and the date that the computer should shut down

    After completing the previous step, go to ‘start a program and locate ‘program/script’ and enter ‘shutdown’ on the ‘add arguments box’. Now enter –s –f –t 60. The 60 will stand for the seconds you have before the shutdown countdown ends. Changing the arguments to t-0 will cause an immediate shutdown

    You are done setting a schedule for shutting down your Windows 10 machine so that you can save power when the machine is not in use for some time. 

    Conclusion

    Although the steps listed above may look a bit confusing, it is quite easy to follow if you read them carefully.

    I am sure that this article has been helpful to you and you now know how to set a shutdown schedule on your computer.

    Please make sure to visit the site after reading this and check out the other tutorials on this site for all your computer-related problems.

  • How To Know How Much RAM You Have In Your Computer

    How To Know How Much RAM You Have In Your Computer

    Surprisingly, some users may not be aware of the specific amount of RAM their computer is equipped with. In this article, we aim to guide you through the process of checking your computer’s RAM capacity.

    Before delving into the practical steps, let’s first provide a brief overview of what RAM entails.

    What Is RAM?

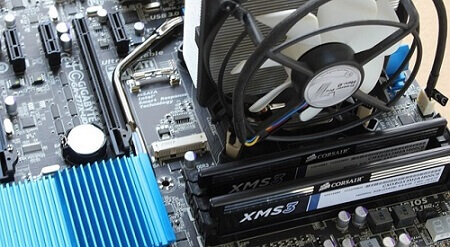
    The term ‘RAM’ stands for ‘Random Access Memory,’ a type of high-speed storage utilized by your computer to temporarily hold data.

    Distinguished from ROM, which retains data until deletion, RAM’s function is pivotal in ensuring that your computer can efficiently manage multiple tasks simultaneously without succumbing to sluggishness or slowdowns.

    In the contemporary tech landscape, it’s worth noting that many laptop computers have their RAM soldered onto the motherboards.

    This design choice limits the upgradeability of the RAM; consequently, if a user desires increased RAM capacity, acquiring a new machine with a larger RAM becomes the only viable option.

    In contrast, desktop computers do not face the same restriction, as their RAM modules are not soldered in. This grants users the flexibility to augment their RAM as needed.

    The process involves acquiring a compatible memory stick and installing it in the desktop.

    Before investing in a new memory stick, often priced at over GHS 300, it’s prudent to assess whether your machine genuinely requires an upgrade.

    A careful evaluation may reveal that the existing RAM suffices, or prompt consideration of other enhancements such as an SSD.

    Continue reading to learn how to ascertain the size of the RAM currently installed on your computer.

    How To Check Your RAM On Windows 10

    For Windows 10 users, checking the installed RAM on your machine is a straightforward process. Simply follow these steps:

    1. Navigate to ‘Settings.’
    2. Within the ‘Settings’ menu, select ‘System.’
    3. From the ‘System’ menu, choose ‘About.’
    4. Locate the ‘Device specifications’ section.
    5. In this section, find the line labeled ‘Installed RAM.’

    This line will provide you with information about the amount of RAM your machine is currently running.

    This quick and accessible method allows you to assess your computer’s RAM configuration without the need for third-party applications or complex procedures.

    Checking Your RAM On Windows 7

    For users still operating on the outdated Windows 7 operating system, considering an upgrade is advisable as Microsoft has discontinued support for this OS. To check the amount of RAM on your computer, follow these simple steps:

    1. Right-click on “My Computer.”
    2. Choose the option labeled “Properties.”

    Under the ‘System’ section, you will find information about the amount of RAM installed on your computer. This direct method allows you to quickly assess your system’s RAM without the need for additional tools or complex procedures.

    Checking The RAM On The Mac

    For Mac users, checking the amount of RAM on your machine is a straightforward process. Here’s how you can do it:

    1. Click on the Apple logo located in the upper left corner of the display.
    2. Select “About This Mac.”

    A window will appear, presenting a simple list of your machine’s specifications, including the current amount of RAM.

    In today’s computing landscape, a RAM capacity of 4GB is considered insufficient due to the advancing nature of computers and their applications.

    Ideally, a RAM size of 16GB and above is recommended for optimal performance.

    If you observe that your Mac is experiencing slowdowns, you can access the Windows Task Manager equivalent by pressing Ctrl+Shift+Esc.

    This will bring up the Task Manager, and by navigating to the ‘Performance’ tab, you can assess the current usage of your computer’s resources.

    Conclusion 

    Unfortunately, modern Macs do not feature upgradeable RAM. In such cases, if you find your Mac slowing down, the prospect of acquiring a new Mac may be worth considering.

    To monitor the active memory usage on your Mac and identify potential performance issues, follow these steps:

    1. Press Command + Space to invoke Spotlight.
    2. Type in ‘Activity Monitor’ and press ‘Enter’ to open it.

    Within the Activity Monitor window, click on the ‘Memory’ tab at the top. Here, you’ll find a graphical representation indicating the amount of RAM in use at that specific moment.

    This allows you to gain insights into your Mac’s real-time memory utilization, aiding in troubleshooting and performance optimization.

  • How To Make Android Device Boot Quicker (Guide)

    How To Make Android Device Boot Quicker (Guide)

    Android stands as one of the predominant mobile operating systems globally, alongside iOS, in a landscape where these two giants have been engaging in a decade-long “battle” for supremacy.

    However, our focus today is not on comparing the two but rather on optimizing the startup speed of your Android device.

    It’s a common experience for some Android devices to take more than a minute to start up, a fact that might be unknown to many users.

    In this article, our mission is to guide you through the process of significantly reducing the boot time of your Android device.

    Let’s delve into the strategies that can make your device boot faster and ensure a quicker and more efficient startup experience.

    How To Make Your Android Boot Quicker

    There are some things that you will have to do to make your android device boot faster and they are:

    Clean Home Screen

    A cluttered home screen, resembling the crowded layout seen on an iPhone home screen, can adversely impact the boot time of your Android device.

    The multitude of apps and unnecessary elements on the home screen can significantly slow down the booting process as the device has to load this information during startup.

    To expedite the boot time of your Android device, it is crucial to declutter your home screen.

    Remove any superfluous apps and widgets that you do not regularly use. Take the extra step to uninstall applications that serve no purpose on your device.

    By streamlining your home screen, you pave the way for a faster and more efficient booting experience on your Android device.

    Unused Apps Should Be Disabled

    Managing and optimizing background apps is a crucial step in enhancing the boot speed of your Android device.

    Apps that run in the background, particularly those constantly seeking updates, can significantly contribute to the slowdown during the booting process.

    To address this, navigate to your device’s settings and access the ‘apps’ section. Here, you can review the installed apps, paying close attention to their permissions and functionalities.

    Identify and disable or uninstall any apps that are not actively in use or those that consume resources in the background.

    By taking control of your app permissions and disabling unnecessary background processes, you ensure a more streamlined booting experience for your Android device, allowing it to start up faster and operate more efficiently.

    Minimize Auto-sync

    The account sync feature, while beneficial for pulling data from your accounts on Android, can have implications on device performance and battery life.

    Even though it serves a useful purpose, it’s advisable to disable it when not in use.

    Turning off account sync when it’s not actively needed can contribute to better device performance and help conserve battery life.

    This adjustment allows you to have more control over your device’s resources, ensuring they are allocated efficiently based on your usage patterns.

    For improved performance and enhanced battery efficiency, consider toggling off the account sync feature when it’s not actively required, striking a balance between functionality and resource optimization on your Android device.

    Third-party Android Launchers

    The appeal of Android lies in its unparalleled customization options, allowing users to personalize their devices to a significant extent.

    One notable customization is the ability to replace the default launcher with a third-party alternative, which can be freely downloaded from the Android store.

    While these third-party launchers offer diverse visual and functional enhancements, it’s essential to consider their potential impact on device performance.

    Using third-party launchers may not be advisable if your primary goal is to maintain a fast and efficient device, as they can introduce delays, particularly during the device’s startup process.

    For users prioritizing a faster boot time, sticking to the default Android launcher might be a preferable choice.

    Striking the right balance between customization and performance is key to ensuring a seamless and efficient user experience on your Android device.

    Cleaning Internal Storage

    Absolutely, managing the internal storage of your Android device is crucial for ensuring optimal performance, especially during the booting process.

    As applications and games continue to demand larger amounts of storage space, it’s essential to adapt and regularly clean up your device’s storage.

    Clearing out apps that are no longer needed, especially those occupying substantial space, can significantly boost the overall performance of your device.

    This not only enhances the speed of the booting process but also ensures smoother day-to-day operation.

    Conclusion

    So now you know how to make your android device run fasten a boot faster. When an android device is filled with so many useless apps and other things, it tends to run slowly.

    This is why it is best to buy a phone with a bigger storage size when you are looking for a new phone.

    This is because about a quarter of the space on the phone is already taken up by the pre-installed apps when you first switch a new phone on. 

    I hope this article was helpful to you. make sure to come back for more tech articles.       

  • How To Change The Themes For Individual Chats On Telegram

    How To Change The Themes For Individual Chats On Telegram

    Telegram has emerged as a prominent messaging application, steadily positioning itself as a robust competitor to WhatsApp, the widely acclaimed messaging platform on a global scale.

    Distinguished by its unwavering commitment to privacy, Telegram aligns with WhatsApp as an instant messaging service.

    It caters to a diverse user base spanning various mobile platforms, encompassing Android, iOS, Windows, and Mac, aligning seamlessly with the accessibility features of WhatsApp.

    A departure from its initial configuration, where users could universally modify default themes, a recent update from the developers introduces a significant enhancement.

    This update empowers users to intricately customize chat themes for individual contacts, transcending the previous limitation confined to altering background settings.

    To harness this advanced feature, ensuring that your Telegram app is running the latest version is imperative.

    Once the update is complete, you can embark on the process of setting distinctive themes for different chats within your Telegram application.

    The subsequent steps outlined below will serve as a comprehensive guide through this nuanced customization process.

    How To Change Individual Themes For Each Telegram Chat

    Below are the steps to change the themes of each app. 

    1. Make sure you are running the latest version of Telegram. If you know that you have not updated, then head over to the Play Store app and update the Telegram
    2. Open the app and then proceed to open any chat
    3. Tap on the three dots
    4. Now choose ‘change colors’
    5. Now choose a theme that you would like to implement
    6. After you have a theme that you would like, just tap on ‘apply theme’   

    And you are done. As you can see, changing the chat’s theme was quite easy. You can follow the same procedure for all the other chats that you wish to change their theme to what you prefer.

    Note that your contacts who are running the newest version of Telegram will also be able to change the theme.

    However, those who are not running the latest version will not be able to do so and they will not be able to see when you change a theme.

    Conclusion

    The ability to customize themes for individual chats on Telegram represents a valuable and empowering feature.

    We trust that this guide has proven beneficial in facilitating a seamless experience for you in implementing these customization options.

    Should you have further inquiries or seek additional insights, do not hesitate to revisit our platform.

    We continually encourage your exploration of diverse tech topics, offering insightful articles and tutorials to aid your understanding and engagement.

    We appreciate your choice in selecting us as your source for tech insights. Thank you for your trust and continued engagement.

  • USB Not Detected? Here Is How You Can Fix It

    USB Not Detected? Here Is How You Can Fix It

    Connectivity issues with computers are a common occurrence that may manifest from time to time, posing challenges that, fortunately, can be addressed with relative ease once the underlying problem is identified.

    Among the issues that users may encounter are connectivity problems with USB devices, such as pen drives or phones connected via USB cable.

    These issues may manifest as messages like ‘device not working’ or ‘USB device not recognized.’ Several factors can contribute to the emergence of these problems.

    One potential cause could be the lack of support for a specific USB device by your computer. However, it’s important not to be unduly alarmed, as these issues are typically solvable through straightforward measures.

    Dealing with such problems can be frustrating, especially when initial attempts at resolution prove unsuccessful.

    To initiate the troubleshooting process, it is crucial to confirm that the necessary USB drivers have been correctly installed on your computer.

    Now, let’s explore some methods to address these connectivity issues. As mentioned earlier, some problems can be resolved with relative simplicity, while others may require a more in-depth investigation to find a solution.

    Checking The Power

    If you find that a device is not working as expected, the initial step is to inspect and ensure the batteries are in proper working condition.

    Check the battery compartment for any signs of corrosion or improper connection. Replace the batteries if they are depleted or damaged.

    This straightforward measure can often resolve issues related to the power supply of battery-operated USB devices.

    By addressing the battery status, you eliminate a potential source of the problem and increase the likelihood of restoring the functionality of the USB device.

    Always remember that even seemingly complex issues can sometimes have simple solutions, and thorough examination can lead to effective troubleshooting.

    Examine The Device Connection

    One of the most straightforward and effective methods to resolve USB connectivity issues is to disconnect and reconnect the USB device.

    This simple action can often rectify common problems and restore proper functionality.

    To implement this solution, start by disconnecting all peripherals from the computer. Once this is done, proceed to disconnect the problematic USB device.

    After a brief pause, reconnect the USB device, ensuring a secure and proper connection.

    This method serves to reset the connection and may address issues related to communication between the USB device and the computer.

    It is a quick and easy troubleshooting step that proves successful in many cases.

    Remember, simplicity can be key in resolving technology issues, and this method exemplifies a practical approach to troubleshooting USB connectivity problems.

    Manufacturer Installation

    Encountering USB connectivity issues may sometimes be attributed to the absence of essential manufacturer-specific software required for proper functioning.

    This scenario is particularly common with certain smartphones that may not operate seamlessly when connected to a computer.

    In such cases, it is essential to proactively address the software aspect by ensuring the necessary manufacturer-specific software is installed on your system.

    Patience can be pivotal, as some smartphones automatically prompt the user to download and install the required software when connected to a computer. This information is often displayed on the phone.

    Wait for the software prompt on your smartphone, follow the instructions provided, and proceed to download and install the required software.

    This step is crucial for establishing a proper connection between the USB device and the computer.

    By addressing the software component, you contribute to a comprehensive troubleshooting approach, increasing the chances of resolving USB connectivity issues effectively.

    Microsoft Support

    In case you are not finding the solution to your problem here, you can seek assistance from Microsoft on the Internet. Just visit http://support.microsoft.com/en-in/help/17614/automatically-diagnose-and-fix-windows-usb-problems

    You will be asked to download a file that will guide you in fixing the problem. 

    Update USB Drivers

    Another way to fix USB error issues is to update the USB drivers on your computer. You can get these from the Windows Store or you can download them from Google by searching.

    When downloading from Google, you should be careful to download the correct bit ie. 32bit or 64bit, before you install the drivers and solve the fixed issue.

    You can check the status of the drivers by going to the device manager. Follow the steps below.

    1. open device manager
    2. Expand to ‘other devices’
    3. And then ‘universal serial bus

    If you happen to see some drivers that have been marked yellow, those need to be updated ASAP. In case this method does not work, let us look at the next one.

    Microsoft System Restore

    Maybe the USB device was working perfectly well previously before the issue came in. In this case, you can use the Microsoft system restore facility to solve the issue. Visit this for the Microsoft system restorehttp://support.hp.com/in-en/document/c03327545

    Conclusion

    By carefully following the steps outlined in this article, you can address a range of problems associated with USB devices effectively.

    To recap, these solutions include checking the status of batteries for devices that operate on them, disconnecting and reconnecting the USB device after removing peripherals, and ensuring that the necessary manufacturer-specific software is installed for seamless operation.

    By systematically applying these methods, you enhance your chances of resolving USB issues without encountering significant difficulties.

    Remember to approach the troubleshooting process patiently and systematically, as each step contributes to a thorough examination of potential problems and their solutions.

    Feel free to refer back to this article whenever you encounter USB connectivity issues, and you’ll be well-equipped to tackle them with confidence.

    Troubleshooting technology concerns can be a rewarding process when approached with a clear understanding of the potential solutions at your disposal.

  • How To Reduce Recycle Bin Disk Space On Your Computer

    How To Reduce Recycle Bin Disk Space On Your Computer

    The Windows 10 operating system presents a common challenge for users as the storage space on their computers tends to fill up rapidly over time.

    Fortunately, Windows offers built-in tools to address this issue, including Storage Sense, Disk Defragmenter, and Disk Cleanup.

    Among these tools, one crucial aspect often overlooked is the management of files in the Recycle Bin. When a file is deleted, it is sent to the Recycle Bin as a safety net in case retrieval is necessary.

    Users are advised to check the Recycle Bin before permanently emptying it, as accidental deletions can occur.

    However, failure to regularly empty the Recycle Bin can lead to a significant accumulation of files, unbeknownst to the user. This oversight can result in a substantial loss of storage space, sometimes exceeding 20GB.

    To proactively address this issue, users can optimize their storage management by adjusting the allocated space for the Recycle Bin.

    By reducing the space size, one can prevent the Bin from unintentionally amassing excessive data. The following steps detail how to adjust the Recycle Bin’s allocated space:

    How To Reduce Recycle Bin Space

    Follow the steps listed below to reduce the storage size of the recycle bin.

    1. Right-click on the recycle bin icon. It is normally seen on the top left corner of the screen by default
    2. Now, click on the properties
    3. Choose ‘customize size’
    4. In the fields provided, enter the size that you want
    5. You will also see an option that says ‘do not move files to recycle bin’ it is not advisable to choose this option unless you know exactly what you are doing. Choosing this option will delete all files permanently without sending them to the recycle bin. This can be dangerous if you accidentally delete an important file or folder.

    Conclusion

    With the Recycle Bin’s storage size now adjusted, as demonstrated, the process proves to be straightforward.

    It is imperative to cultivate the habit of inspecting the contents of the Recycle Bin before proceeding with the permanent deletion of files.

    This precautionary measure ensures the safeguarding of important files, preventing inadvertent loss.

    By incorporating these practices into your routine, you contribute to a more efficient and organized management of your computer’s storage space.

    Regularly monitoring and maintaining the Recycle Bin, coupled with the optimized storage allocation, will help streamline your computing experience and mitigate the risk of unintentional data loss.

  • How To Enable Predictive Text With Autocorrect In Windows 10

    How To Enable Predictive Text With Autocorrect In Windows 10

    Predictive text and autocorrect features are widely known among Android users, simplifying the typing experience on mobile devices.

    While these features may not be universally available on all Android devices, they are commonly found.

    What you might not be aware of is that you can enjoy the same predictive text and autocorrect functionality on Windows 10.

    Many users find this feature beneficial for enhancing their typing experience on computers.

    For those using Windows 10, activating predictive text and autocorrect is a straightforward process. In this article, we will guide you through the steps to enable these features on your Windows 10 machine.

    Follow these simple steps to enhance your typing experience on Windows 10 with predictive text and autocorrect features.

    We aim to provide you with clear and easy-to-follow instructions, ensuring you achieve the desired outcome effortlessly.

    Now, let us look at how you can enable the features mentioned above in your computer.

    Steps To Activate Predictive Text And Autocorrect On Windows 10

    1. Click on the Windows 10 start button
    2. Go to ‘settings and click on ‘devices’
    3. Now click on ‘typing’, this can be found on the left pane
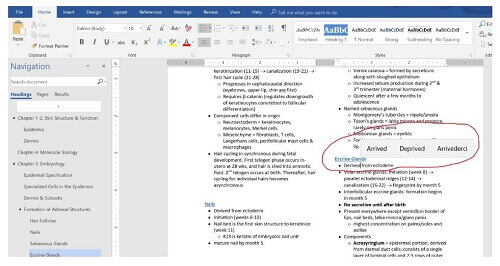
    4. You will see a hardware keyboard and under this, there will be two options. These options are, ‘show the text as I type’ and ‘autocorrect misspelled words I type’ Turn these options on or you can choose one you so wish

    Now, you will see that each time you are on a text editor, text suggestions will be shown to you as you type.

    Note that this only works well with a hardware keyboard so you will need to get yourself a hardware keyboard.

    Conclusion

    You now know how to enable the predictive text and autocorrect feature in your Windows 10 operating system.

    This feature will make it quite easy for you when you are typing so that you will not always have to be typing all the words yourself.

    The autocorrect will also help you to avoid spelling mistakes as you type. Go ahead now and try it, you can also check out how to add text to PDF files with the Microsoft browser.

    After you are done, make sure to come back to this website for more educational tech.

    Make sure to leave any comment regarding any issues you may be having with your machine and we will make an article about that for you.